How do I add a custom service to my website?
Whether you have one location or many, the Command Center Service Manager allows you to easily enter and display the services your business offers. You can add (and remove) pre-loaded services, create custom services, and apply pricing and availability for each service based on one or more store locations.
In addition, you can configure the Service Appointment form on your website to allow or prohibit appointment requests based on your store hours, lead time, holidays, and other excluded dates for each store location.
Adding Custom Services
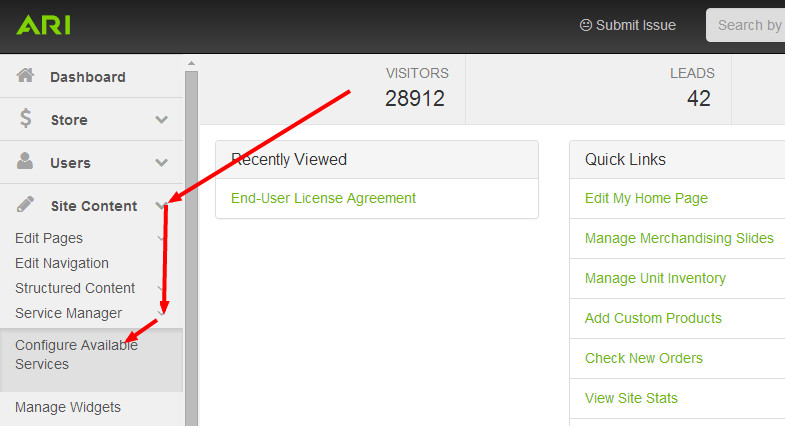
Start from the Command Center Dashboard (a.k.a. Home page). Click on and expand the Site Content section, then click Service Manager > Configure Available Services.
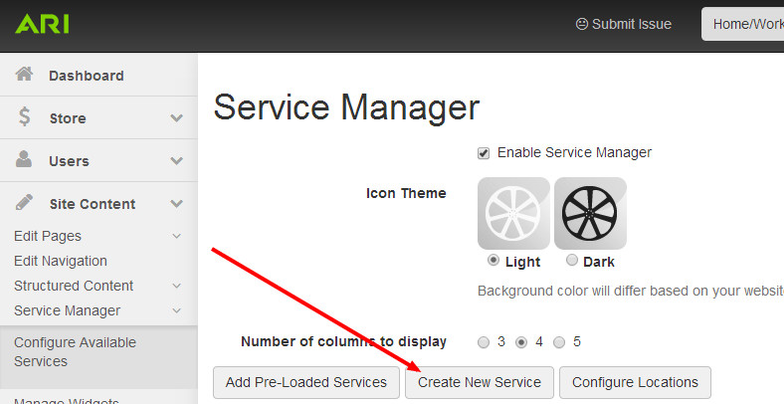
- Within the Service Manager, you will see buttons labeled Add Pre-Loaded Services and Create New Service. If you have multiple locations as part of your package, you will also see an option to Configure Locations. To add a custom service, click Create New Service.
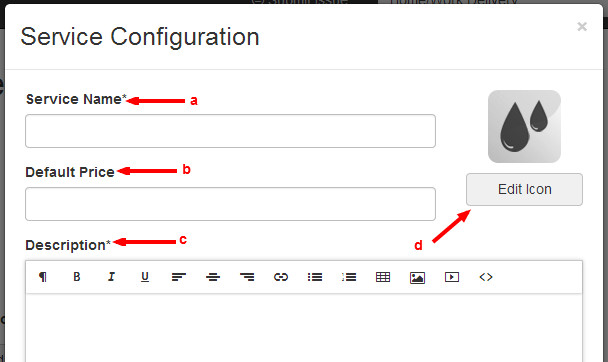
- A modal window labeled Service Configuration will open. Within this window, you can edit or change the following:
- Service Name: Enter your service information here. This is a required field. This field will display as the name of the service on your website for all of your store locations that are mapped to the service.
- Default Price
- Single Location Website: This value will display as the service price on the corresponding areas of your website.
- Multi-Location Website: This value will display as the "default" service price on the corresponding areas of your website. To assign a different price for a service at one or more of your locations, please see the help article How do I configure services for all my locations?
- Description: Enter your service information here. This is a required field.
- Edit Icon: You can add a service icon from a pre-loaded library of service icons, or you can upload your own image from your computer. Please note that icons always display in a uniform size and dimension of 73 pixels by 73 pixels, regardless of the size of the image you may upload.
When you're done editing the service, click Save Changes.
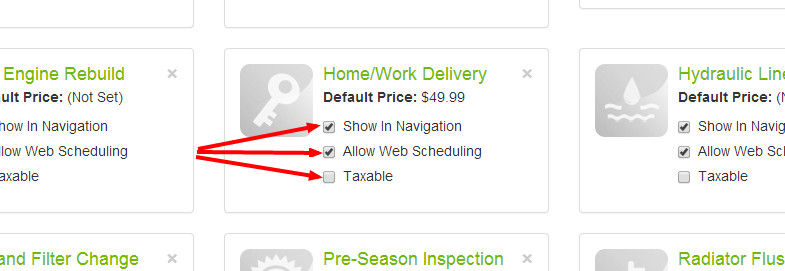
- Within the grid of services on the Service Manager page, locate the service you just edited. Note that there are additional settings that can be configured by a check box selection within the service window.
- Show in Navigation: This check box is pre-selected by default. If your main Services page (www.your-domain.com/service-list.htm) is present in your website's primary navigation menu, enabling this setting will automatically include the service as a dropdown selection beneath the Services navigation link.
- Allow Web Scheduling: This check box is pre-selected by default. If you have the Request Service form active on your website (www.your-domain.com/request-service.htm), enabling this setting will allow your customers to submit a service appointment request from your website.
- Request Service Form Settings: For any location that will offer online appointment requests, you must first enable Online Scheduling and enter a valid email address for the Request Service form. Please see the article entitled How do I configure my Request Service form? for specific instructions.
- Taxable: If sales taxes apply to your service, you can check this box to designate that.
Multi-Location Websites: To exclude a service or assign a different price to any given location, please see the help article How do I manage my services for multiple store locations?
Related Articles