How do I customize the brand images in my new model showcase?
The brand images used in the new model showcase will default to the most recently published lifestyle (action) shot from each brand. If a lifestyle image is not available, the most recent studio (product) image will be the default. This ensures that as brands are updated throughout the model year, the most recently published imagery is used to represent each brand.
If you wish to customize the brand images used, you can do so for each brand. You have 3 options:
- Select an image from ARI's published image library.
- Provide your own custom image.
- Use the system default image.
Follow the steps below to navigate to the Showcase Catalog Brand Sequencing section of your Command Center. Then, follow the instructions for the option you wish to use.
Navigate to Showcase Catalog Brand Sequencing:
- From the Command Center Dashboard, select Store > Catalog Manager > Showcase Catalog Brand Sequencing from the navigation panel on the left side. Alternatively, you can search for 'Showcase Catalog Brand Sequencing' in the Command Center search bar and select the 'Showcase Catalog Brand Sequencing | Admin' suggestion.
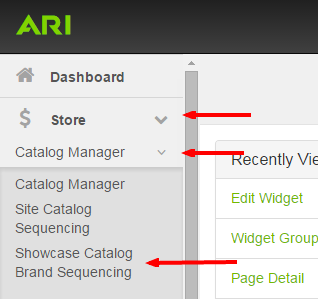
- Locate the brand you wish to customize, then click the image icon next to the brand name.

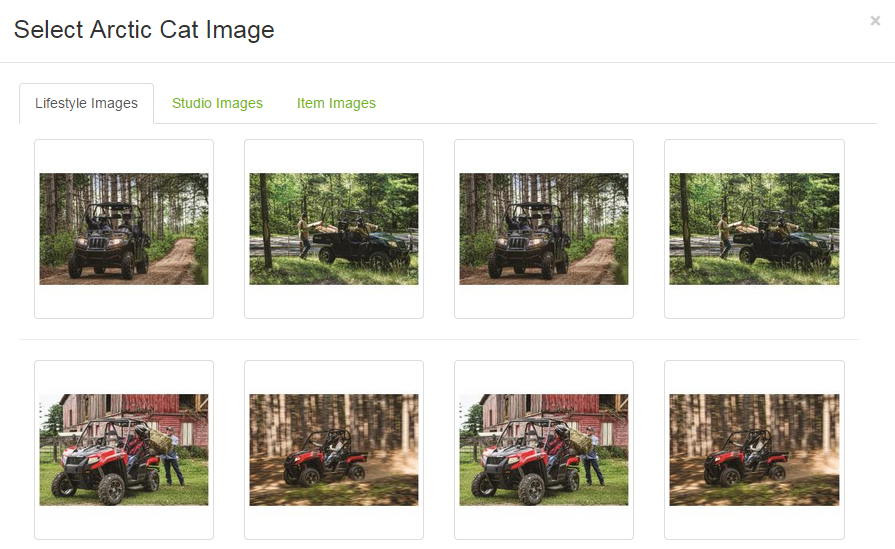
Select an image from ARI's published image library:
- Select the 'Select from stock (Brand) images' radio button.
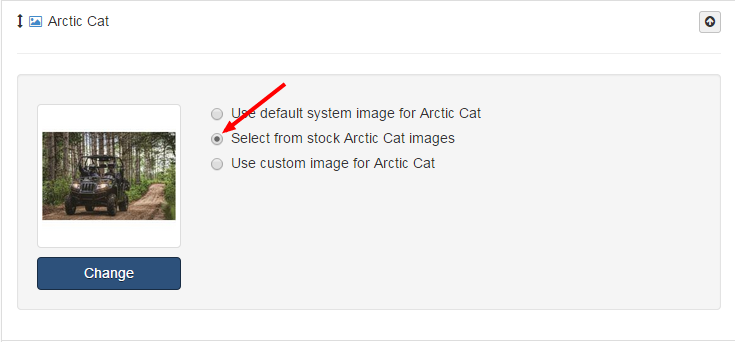
- Browse the Lifestyle Images, Studio Images and Item Images available within ARI's image library and select the image you wish to use. Some brands may not have all 3 categories available.
- Once you've selected an image, your changes will be saved automatically. From the Websites menu in the top-right corner, click Publish Changes.
Provide your own custom image:
- Select the 'Use custom image for (Brand)' radio button.
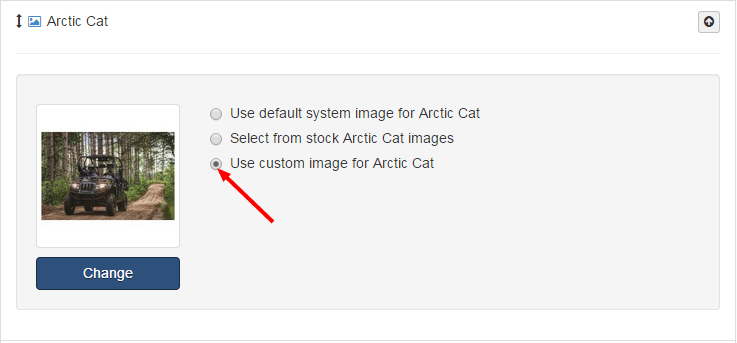
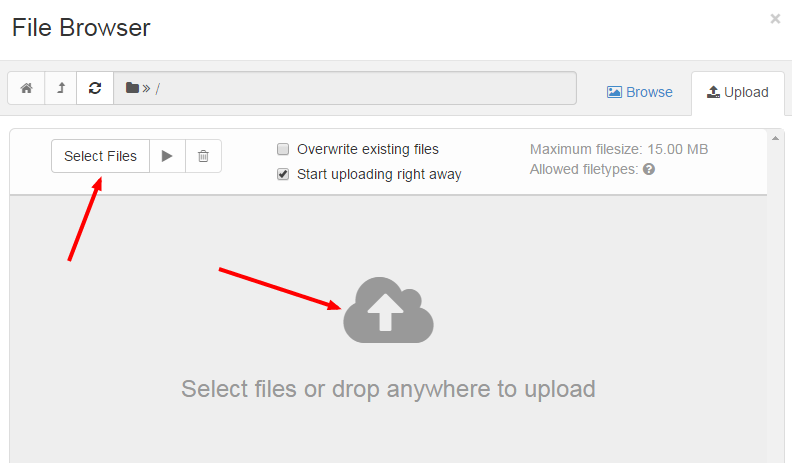
- From the File Browser, click on the Upload tab.
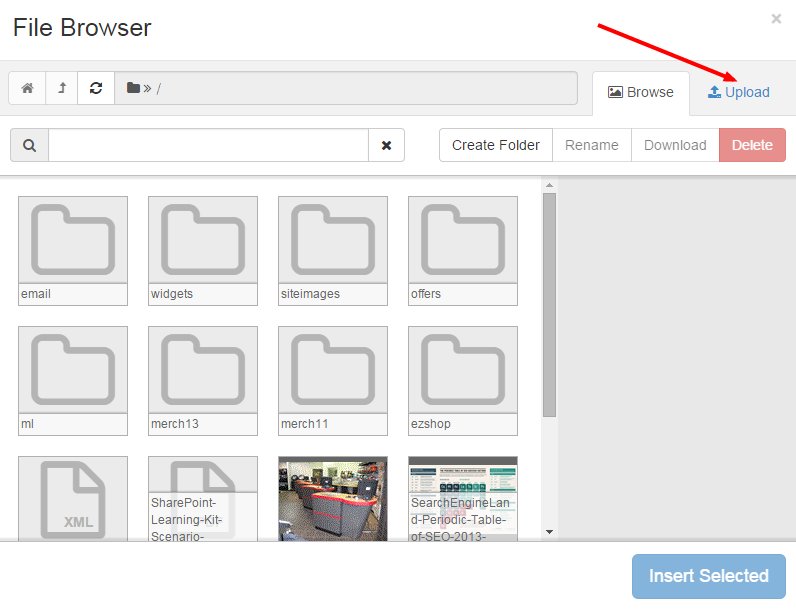
- Click the Select Files button to browse your computer for your custom image. Alternatively, you can drag the image directly onto the Upload screen.
- When you've finished uploading, return to the Browse tab.

- Locate the image you uploaded, select it and click Insert Selected.

- Changes you've made will automatically save. From the Websites menu in the top-right corner, click Publish Changes.
Use the system default image:
- Select the 'Use default system image for (Brand)' radio button.
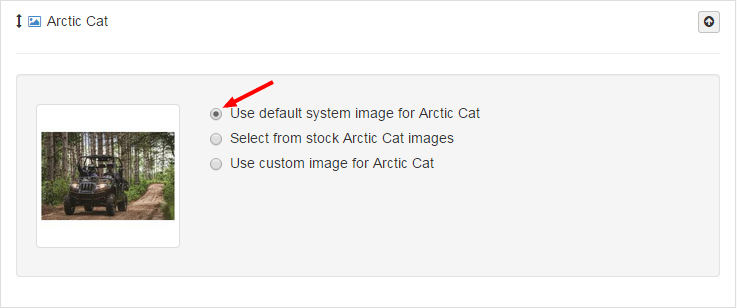
- Changes you've made will automatically save. From the Websites menu in the top-right corner, click Publish Changes.
Need More Help?
Watch our tutorial video, How to Use Catalog Manager.
Related Articles