How do I add a custom catalog to my website?
You can upload your own custom products for sale or display on your website, but you must first create a custom catalog. To create a custom catalog, please proceed to the help article How do I add products to a custom catalog?
Creating a Custom Catalog
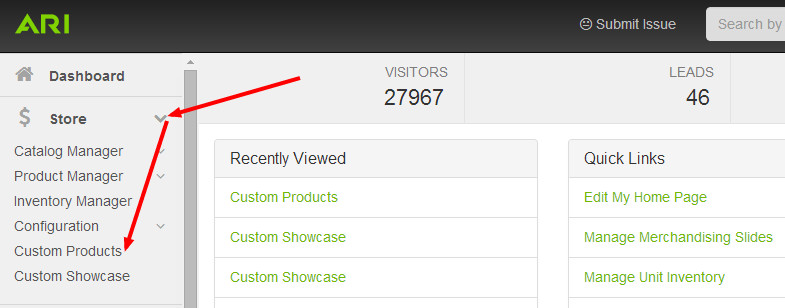
Start from the Command Center Dashboard (a.k.a. the Home page). Click on and expand the Store navigation menu and select Custom Products.
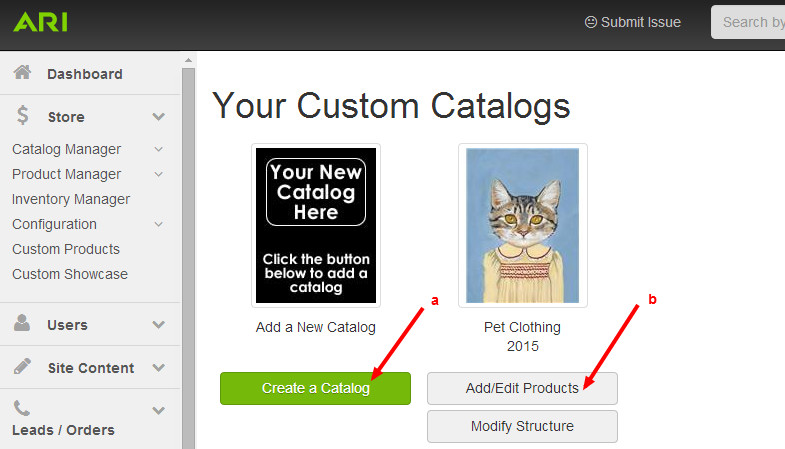
The following page has options to either add a new catalog or to edit an existing one.
To add a new catalog, select Create a Catalog and proceed to Step 3 of these instructions. .
If you merely wish to add a new product to an existing catalog, proceed to the help article How do I add products to a custom catalog?
- Enter the required information for your new custom catalog, as follows:
- Year (Required): Select the appropriate catalog year from the dropdown list.
- English Catalog Title (Required): Enter a name for the catalog. This is the catalog name that will display on your website.
- Industry (Required): Select the applicable industry
- Company Name (Required): Click into this dropdown list and do one of the following:
- If the desired product manufacturer is represented in the alphabetical dropdown list, select it.
- If the product manufacturer is not represented in the dropdown list, select + Add a New One (this choice is at the top of the dropdown list) and enter the appropriate information into the New Company Name field.
- Industry Shopping Types (Required): If there is an existing check box menu of types and one or more of them applies to the catalog you are creating, select the applicable check box(es). Otherwise, enter one or more new types using the Add New Type function.
Select Save and Continue.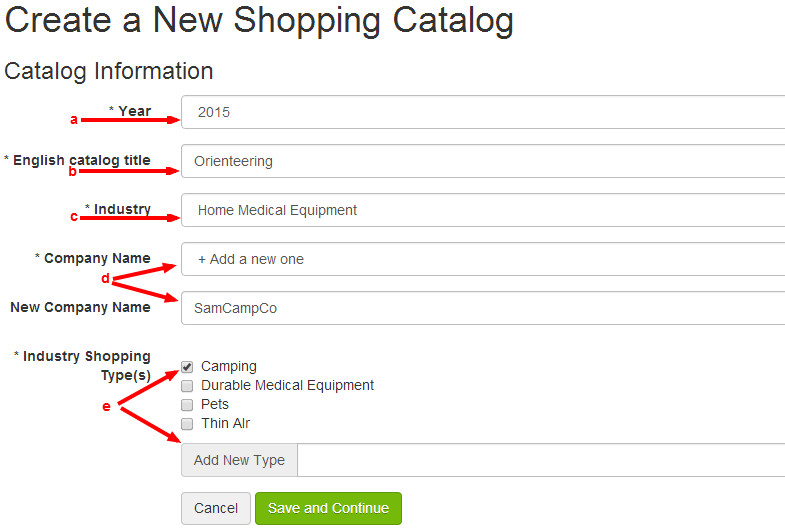
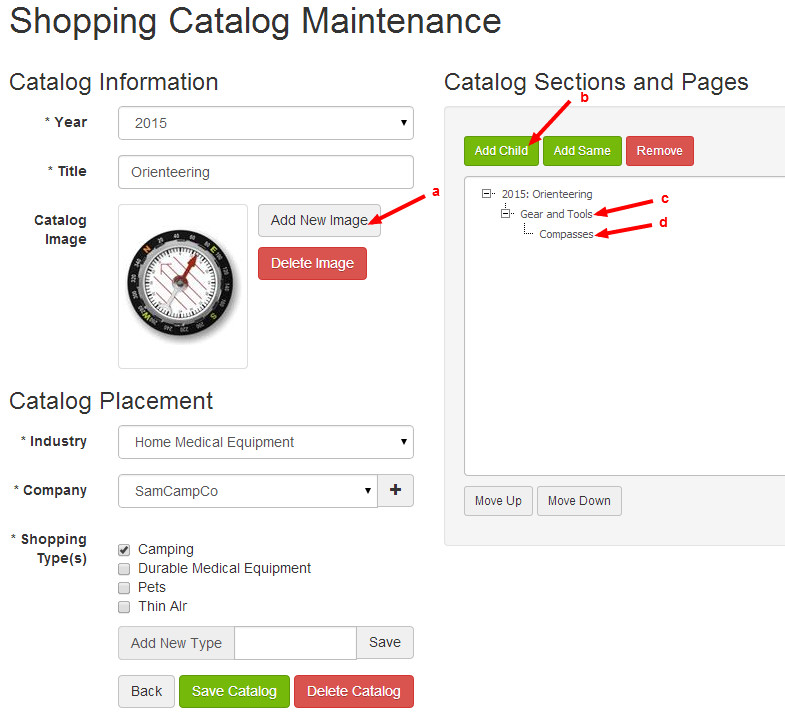
- You will be directed to the Shopping Catalog Maintenance page.
- Add New Image (Optional, but Recommended): Select to add an image that represents your custom catalog. On your website this will display as the catalog "cover."
- Create a Catalog Section: In order to add any products to your custom catalog, you must first create at least one catalog section (as well as one custom page as described in step 4d below).
A catalog section serves as a division of your catalog. For example, if you sell apparel, you may choose to create catalog sections for "Shirts," "Hats," and "Boots."- To add a catalog section, proceed to Catalog Sections and Pages on the upper right side of the page.
- Click the catalog title to highlight it. The catalog title is 2015: Orienteering in the image example below.
- Select Add Child.
- Create a Catalog Page: A section labeled New Node will display as a tier beneath your catalog. To rename this section, click on New Node and type the name that applies. The New Node section has been renamed "Gear and Tools" in the image example below.
- Create a Catalog Page: Click to highlight the catalog section that you just created, and again click Add New. A tier labeled New Node will again display, except it will be directly beneath the catalog section. To rename, click on the New Node page and type the name that applies. The New Node page has been renamed "Compasses" in the image example below.
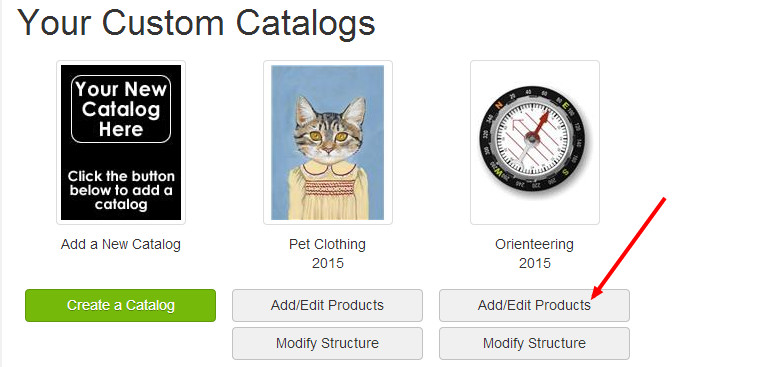
- You will be returned to Your Custom Catalogs, and the new catalog you created will be available for entering products. For instructions on adding customs products to your catalog, please proceed to the help article How do I add products to a custom catalog?
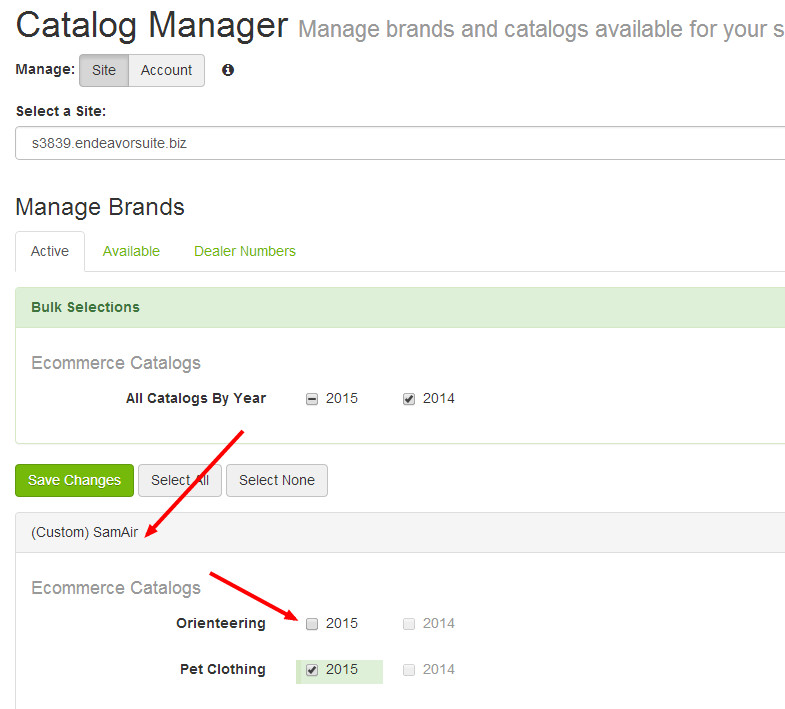
- After you've added products, you will need to publish your catalog it to your website. Select Store in the navigation menu, then select Catalog Manager > Catalog Manager.
- Select your custom catalog, which will be displayed beneath the Bulk Selections section. Your catalog will be preceded with (Custom). Once selected, a check box menu for the catalog years will display. Choose the year or years that apply and select Save Changes.
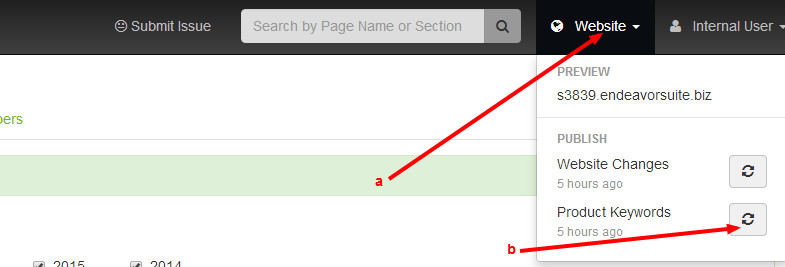
- Navigate to the Website dropdown menu, which is located in the upper right header bar.
- Click to expand the menu.
- Click the Product Keywords refresh icon. This icon will change into a green button with a white check mark once publishing is complete.
Related Articles