/
How do I import customer accounts using CSV upload?
How do I import customer accounts using CSV upload?
- Hope Mueller
Owned by Hope Mueller
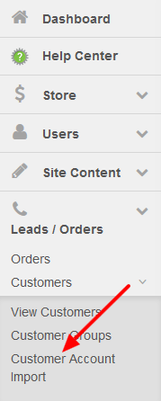
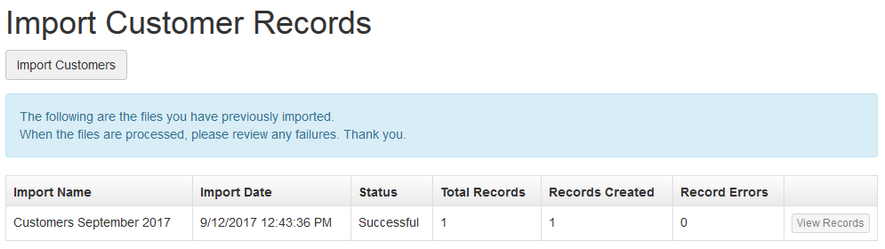
- Go to Customer Account Import. From the left navigation, click on Leads/Orders, then Customers, and finally on Customer Account Import.
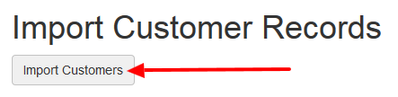
- Click on the Import Customers button.
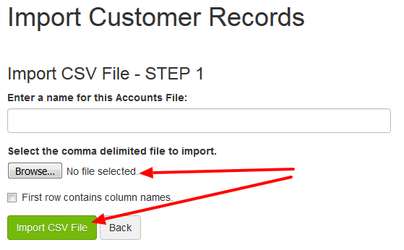
- Click on the Browse button to select the file for upload and then click on the Import CSV File button. Optionally, enter a name for the file you are uploading, such as "Customers September" to help keep track of your upload history. Remember to check the box for "First row contains column names" if your file contains descriptive headers.
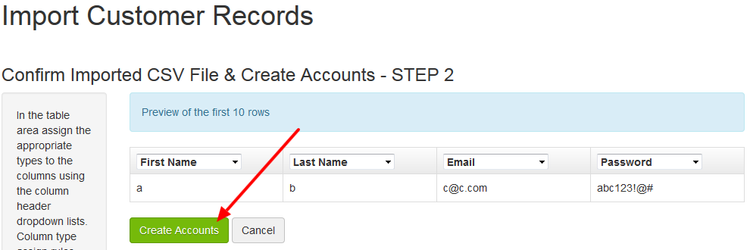
- In Step 2, map your column headers to the correct columns of data and click on the Create Accounts button. At a minimum, you must map "Email" and "Password" column data in order to continue with the upload.
- Additional optional fields that can be mapped in Step 2 are:
- First Name - The customer's first name
- Last Name - The customer's last name
- Company - The company name the customer works for if applicable
- Username - An identifier that can be used in place of email during login
- Account Alias - A secondary username
- Phone - The phone number of the customer
- Fax - The fax number of the customer
- Additional optional fields that can be mapped in Step 2 are:
- The next screen will tell you how many rows were successfully converted to customer accounts from your upload.
Related content
CSV Upload Help Instructions
CSV Upload Help Instructions
More like this
SharpSpring to Marketo List Migration
SharpSpring to Marketo List Migration
More like this
How do I import custom ecommerce catalogs?
How do I import custom ecommerce catalogs?
More like this