ARI Responsive Websites
Managing Products and Product Variants
- Sam Carlson (Deactivated)
Product Manager allows you to set the pricing (MSRP, store or sale), add products to groups and control availability for your Ecommerce and Showcase products.
A. Finding Products
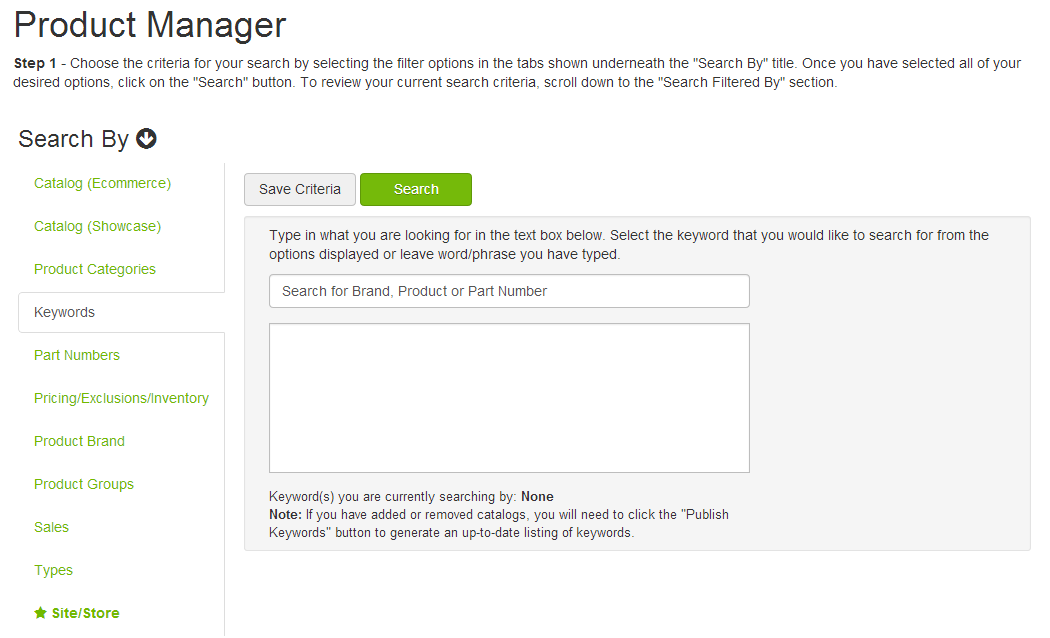
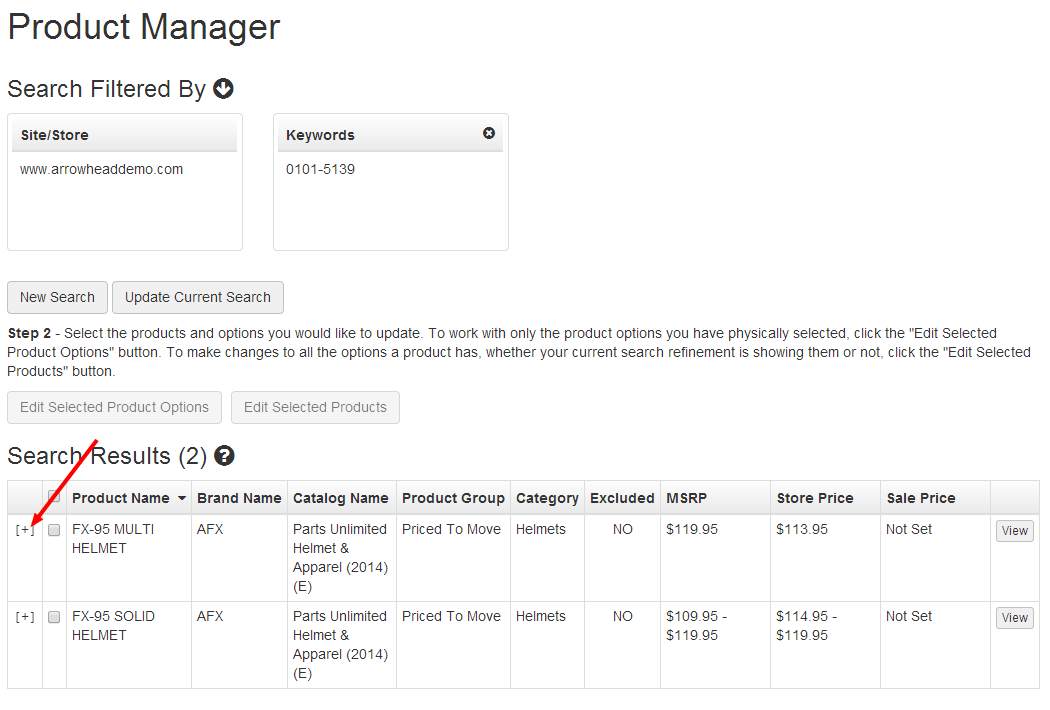
1. Go to Products > Product Manager
2. Use the search tool to navigate to the products that you wish to manage. The default search tool is a keyword/part number search bar. Additional Search By options include....
- Catalog (Ecommerce)
- Catalog (Showcase)
- Product Categories
- Keywords
- Part Numbers
- Pricing/Exclusions/Inventory
- Product Brand
- Product Groups
- Sales
- Types
- Site/Store
Choose the option that best applies to your task, enter your search criteria and click Search.
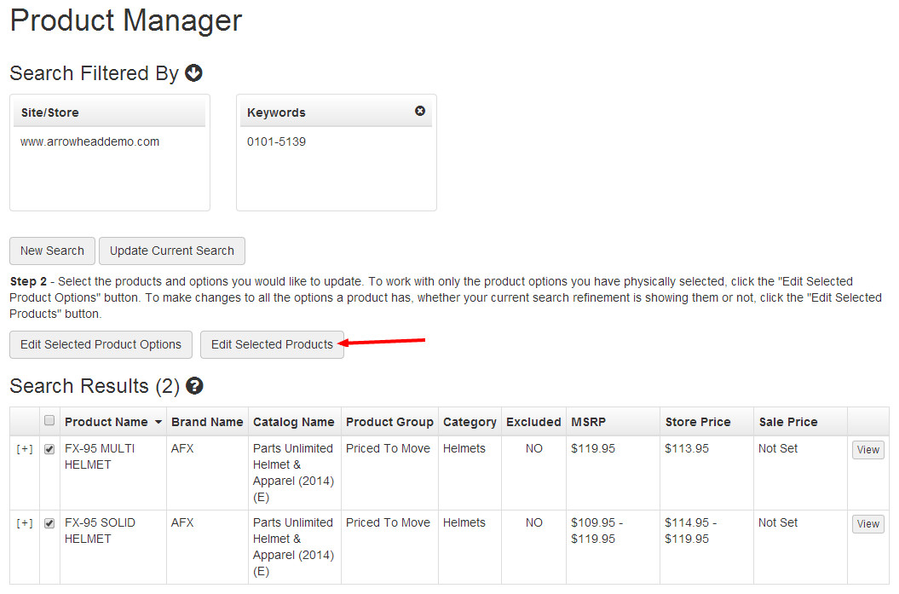
3. The results of your search will display in a table comprised of several columns.
Please note: If the results do not include the products you're searching for, or if you wish to refine the search results further, click Update Current Search. If you'd prefer to start over, click New Search.

B. Managing Products
1. Follow the instructions under the Finding Products section of this page, then proceed to step 2 below.
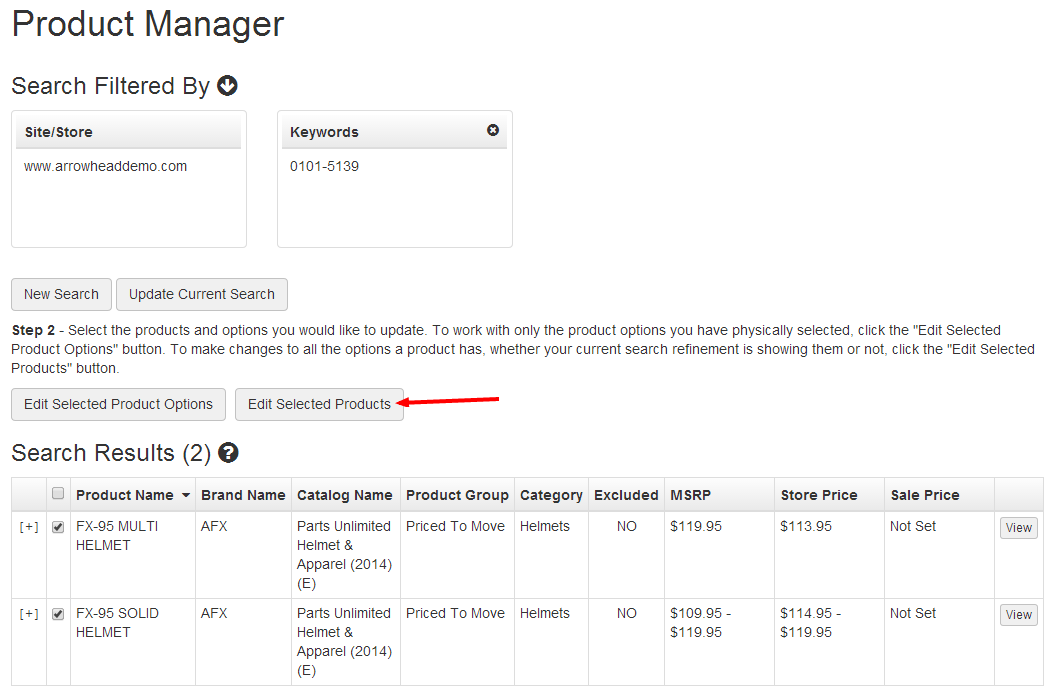
2. On the Product Manager Search Results page, select the products that you wish to edit. This can be done individually, or in bulk, by using the check box fields in the second column of the products table.
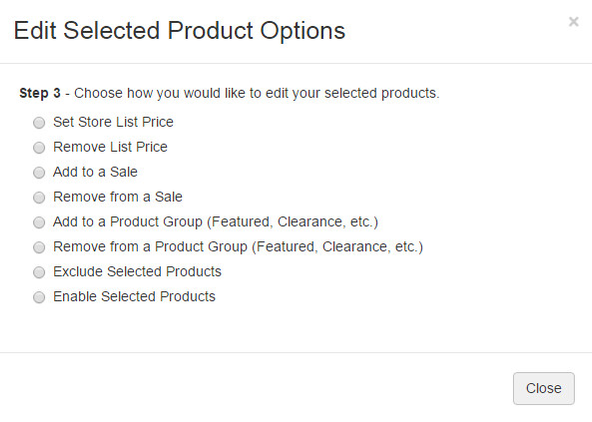
3. Click Edit Selected Products. A modal window titled Edit Selected Product Options will open.
4. The modal window offers the following product management options...
- Set Store Price: Applies a price rule to the product or group of products selected. Options include...
- Percentage Off MSRP
- Percentage Above MSRP
- Dollar Off MSRP
- Dollar Above MSRP
- Fixed Dollar Value
- Call For Price
- Remove List Price: Removes the list price on the product or group of products selected.
- Add to a Sale: Adds the selected product or products to a new or existing Sale.
- Remove from a Sale: Removes the selected product or products from a Sale.
- Add to a Product Group: Adds the selected product or products to a Product Group
- Remove from a Product Group: Removes the selected product or products from a Product Group
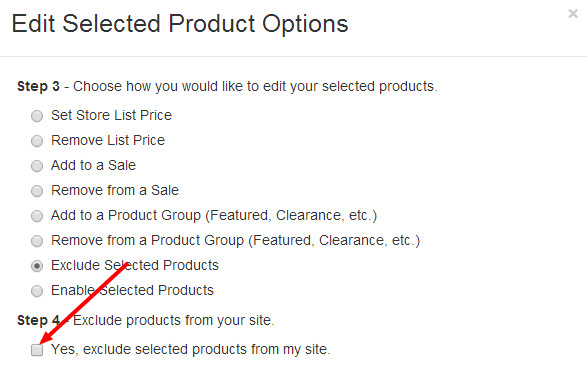
- Exclude Selected Products: Removes the selected product or products from display on your website
- Enable Selected Products: Re-enables the excluded product or products, so that they display on your website
5. Once you have chosen your option under Step 3 (see the image example), a finalization step will display as Step 4. Follow the instructions that display for Step 4 and click Save Changes
C. Managing Product Variants
1. Follow the instructions under the Finding Products section of this page, then proceed to step 2 below.
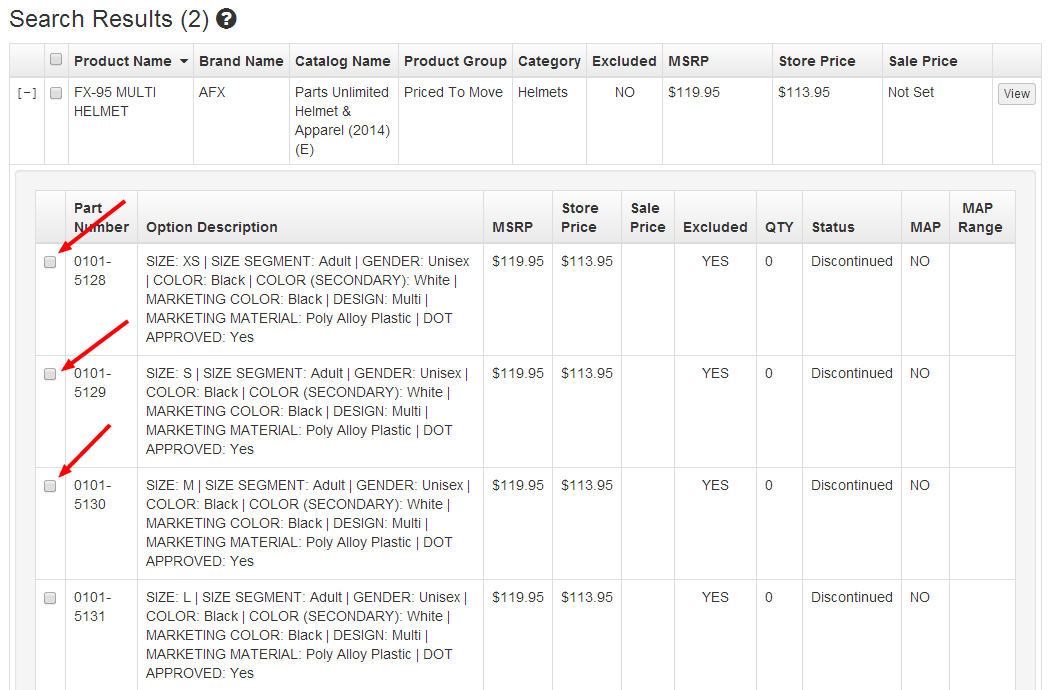
2. Expand the product result that contains the variants you wish to manage, using the [ + ] displayed in the left most column.
3. Select the check boxes next to the variants you wish to manage.
4. Click Edit Selected Products. A modal window titled Edit Selected Product Options will open.
5. The modal window offers the following options...
- Set Store Price: Applies a price rule to the variant or variants selected. Options include...
- Percentage Off MSRP
- Percentage Above MSRP
- Dollar Off MSRP
- Dollar Above MSRP
- Fixed Dollar Value
- Call For Price
- Remove List Price: Removes the list price on the variant or variants selected.
- Add to a Sale: Adds the selected variant or variants to a new or existing Sale.
- Remove from a Sale: Removes the selected variant or variants from a Sale.
- Add to a Product Group: Adds the selected variant or variants to a Product Group
- Remove from a Product Group: Removes the selected variant or variants from a Product Group
- Exclude Selected Products: Removes the selected variant or variants from display on your website
- Enable Selected Products: Re-enables the excluded variant or variants, so that they display on your website
6. Once you have chosen your option under Step 3 (see the image example), a finalization step will display as Step 4. Follow the instructions that display for Step 4 and click Save Changes