/
Add Pre-loaded Services
ARI Responsive Websites
Add Pre-loaded Services
- Sam Carlson (Deactivated)
Owned by Sam Carlson (Deactivated)
Go to Store > Services
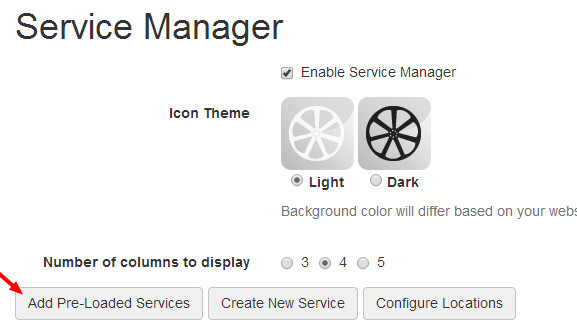
- Within the Service Manager, you will see buttons labeled Add Pre-Loaded Services and Create New Service. If you have multiple locations as part of your package, you will also see an option to Configure Locations.
- To add a pre-loaded service, click Add Pre-Loaded Services.
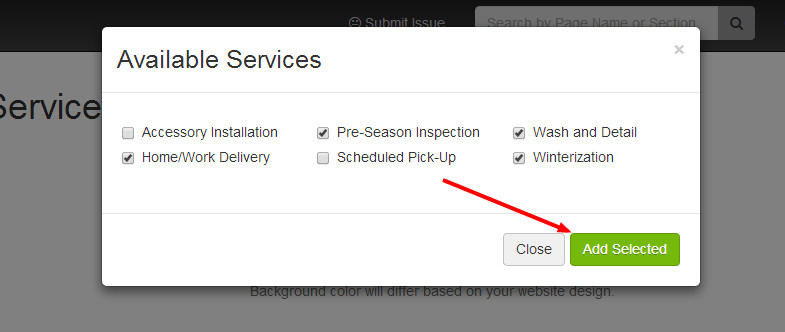
- A modal window labeled Available Services will open to display the pre-loaded services. This list will only show the services that are not already active on your website. Choose one or more services and click Add Selected.
- The services that are enabled on your website will display alphabetically in a three-column grid on the Service Manager page. To edit a service, click the service title.

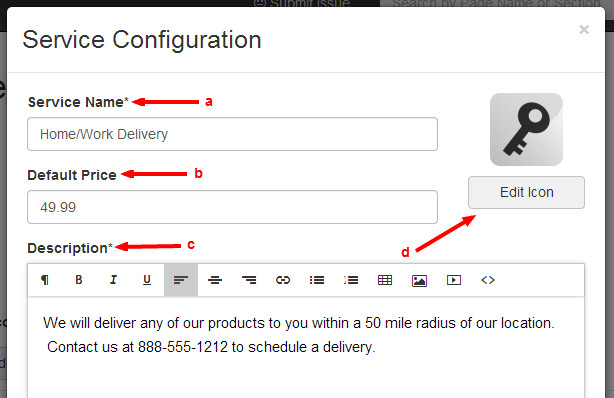
- A modal window labeled Service Configuration will open. Within this window, you can edit or change the following:
- Service Name: Changes to this field will change the name of the service on your website for all of your store locations that are mapped to the service.
- Default Price
- Single Location Website: This value will display as the service price on the corresponding areas of your website.
- Multi-Location Website: This value will display as the "default" service price on the corresponding areas of your website. To assign a different price for a service at one or more of your locations, please see the help article How do I manage my services for multiple store locations?
- Description: Enter your service information here. This is a required field.
- Edit Icon: You can change the image associated with your service to one from a pre-loaded library of service icons, or you can upload your own image from your computer. Please note that icons are always displayed in a uniform size and dimension of 73 pixels by 73 pixels, regardless of the size of the image you may upload.
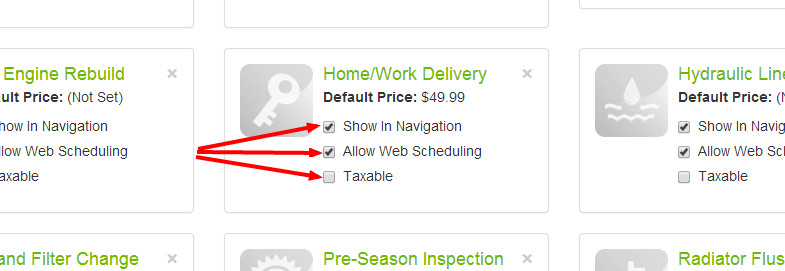
When you're done editing the service, click Save Changes. - Within the grid of services on the Service Manager page, locate the service you just edited. Note that there are additional settings that can be configured by a check box selection within the service window.
- Show in Navigation:This functionality has been decommissioned, and applying these settings will have no effect on your website.
- Allow Web Scheduling:This functionality will become available in January 2017. If you have the Request Service form on your website, enabling this setting will allow your customers to submit a service appointment request from your website.
- Request Service Form Settings: For any location that will offer online appointment requests, you must first enable Online Scheduling and enter a valid email address for the Request Service form. Please see the article entitled Enabling the Request Service Form for specific instructions.
- Taxable: If sales taxes apply to your service, you can check this box to designate that.
Multi-Location Websites: To exclude a service or assign a different price to any given location, please see the help article Managing Services for Multiple Store Locations
Related Articles
, multiple selections available,