ARI Responsive Websites
OEM Parts: Uploading a Price File
If you sell OEM parts, you can upload and apply custom prices by following the instructions below.
Step-by-Step guide
1. Log into ARI CMS and go to "Integrations"
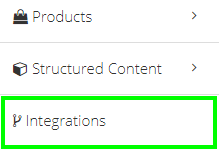
2. From the drop down menu for "Type", select “Microfiche”.
3. From the drop down menu for "System", select “Parts Lookup”.
4. If your account has more than one website, select the website for which you are uploading the price file.
5. Select "OEM Parts Lookup Editor".
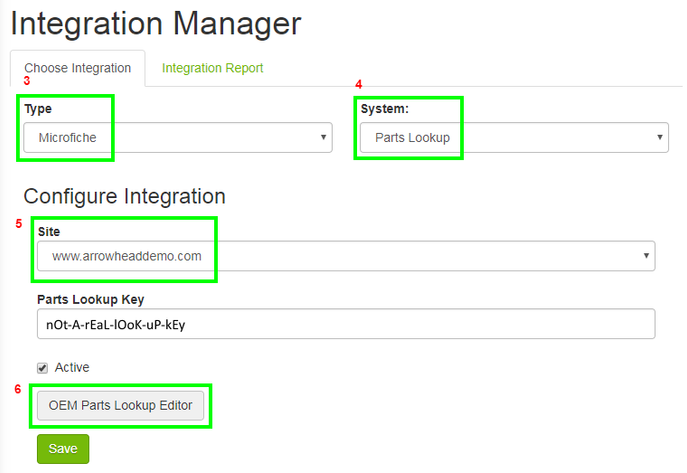
6. Select "Upload Price File".

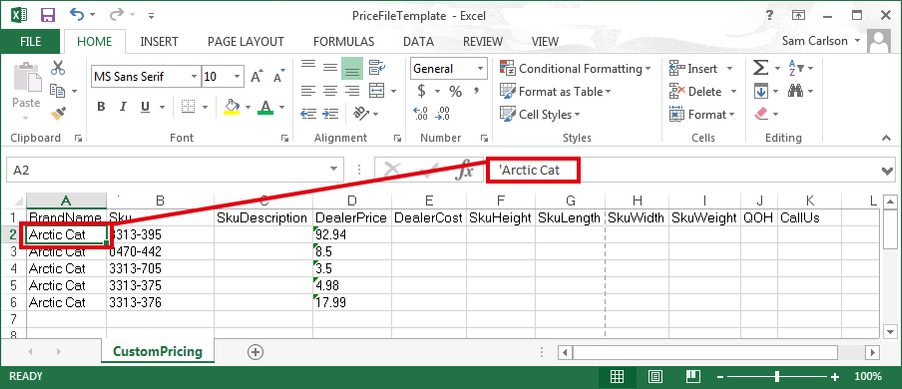
7. Select "Download File Template". Once it's finished downloading, open the file.
8. IMPORTANT: Do not rename any of the fields in the first row of the template file, and do not rename the worksheet from "CustomPricing".

9. The following fields are required for any part for which you are uploading information:
- BrandName
- Sku
- DealerPrice
10. The following fields are optional:
SkuDescription
DealerCost
SkuHeight
SkuLength
SkuWidth
SkuWeight
QOH
CallUs

11. For the first 11 rows (rows 2-11), all the fields with data must start with an apostrophe ( ‘ ). These apostrophes will not show in the cells, but you can verify that they are present by selecting a cell with data and verifying the data in the Formula bar.
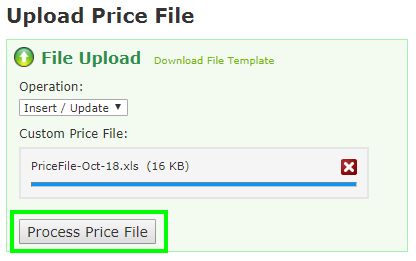
12. Once you have created and saved your price file, proceed to the "Select File" button to upload.

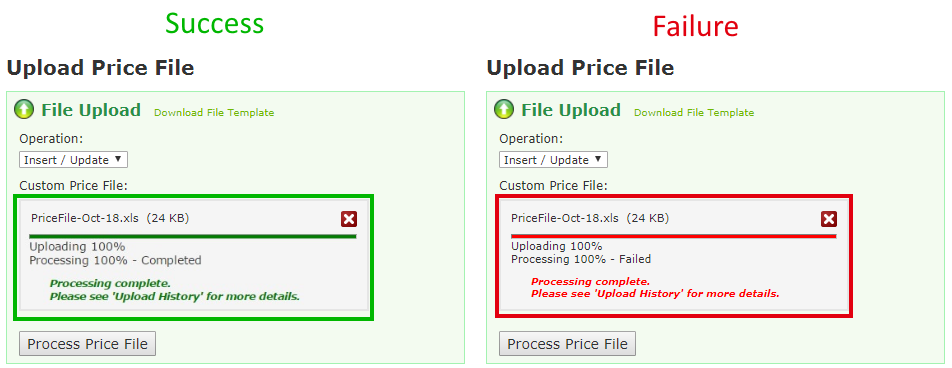
13. When the file dialogue displays under "Custom Price File", select “Process Price File”.
14. Once the upload has been captured, the status will read as “Completed”.
If the upload is unsuccessful, the status will read as “Unsuccessful Download”. When this happens, go to the appropraite row under Upload History and find the link labeled "Download Error Log" to download an error log. You can also re-open your price file and manually check for any errors (Like no apostrophes in data cells in rows 2-11).