ARI Responsive Websites
Offers
Add, remove and manage the merchandising offers that display on your website.
Step-by-Step Guide
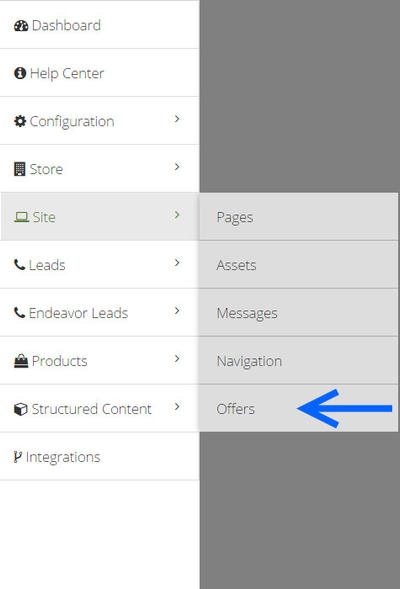
- Proceed to Site > Offers
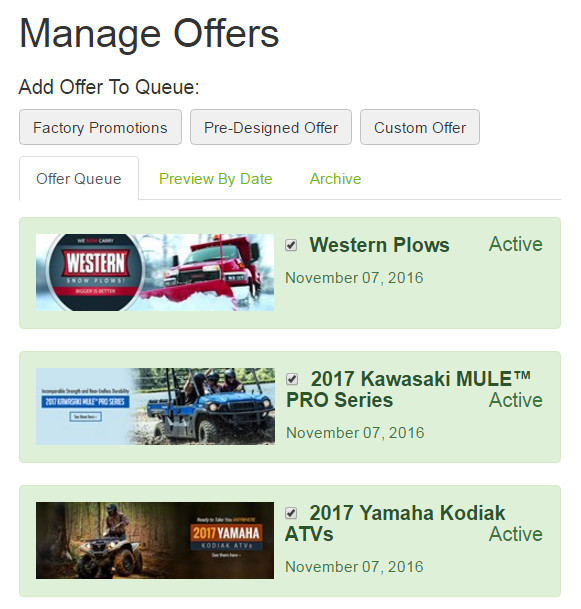
- There are three types of offer types. To jump to the instructions for a given type, click the
- Factory Promotions: Designed to match available OEM promotions. The info within these offers is provided by the manufacturers, with specific terms, benefits, and time restrictions.
- Pre-Designed Offers: These are banner graphics from ARI's merchandising library. There are a wide variety of general offers and messages to choose from.
- Custom Offers: Upload your custom image files to create your own merchandising banner.
- Sort by brand, type, or category by selecting the appropriate tab. Clicking on a brand, type, or category will reveal a list of corresponding offers.
Brand: For powersports websites, this will show the manufacturers for which you have activated pre-loaded unit showcases. For tire websites, this will show the entire list of tire and wheel manufacturers in the system.
Type: Offers and promotions here are organized based on the type of unit or vehicle they pertain to.
Category: Categories are based on the products in ecommerce catalogs.
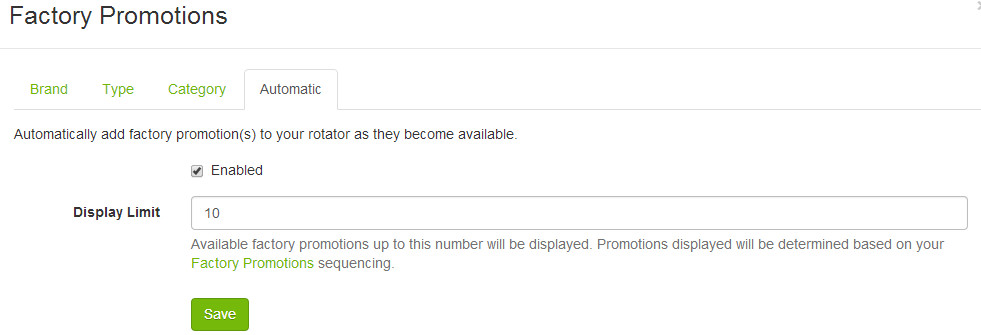
- Automatic: Some industry websites have a feature that can automatically add factory promotion(s) slides as they become available. If you see this tab, you will be presented with a simple enable/disable toggle and a configurable limit. Available factory promotions up to the limit will be displayed, and the display order for automatic promotions will be controlled by your Factory Promotions brand sequencing. If you do not see this tab, this feature is not available for your industry at this time.
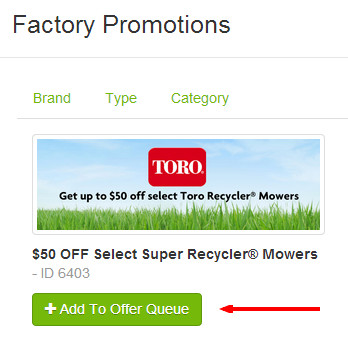
- Once you drill down to the slide you wish to add, click the + Add To Offer Queue button.
- When you have finished adding slides, click Close.
- Click Save Offer. From the drop down menu in the upper-right corner of the ARI CMS, click Publish Changes.
Pre-Designed Offers are slides available from ARI's merchandising slide library. There are a wide variety of general offers or notices, such as “See Our New ATVs” or “Looking for a deal?” available for use on your website.
- Go to Site > Offers
- From the Add Offer To Queue section, select Pre-Designed Offer.
- Sort by brand, offer group, type, or category by selecting the appropriate tab. Clicking on a brand, offer group, type, or category will reveal a list of corresponding offers.
Brand: These offers are tied into a particular brand, but are more generalized. These will be different from the offers in the Factory Promotions section.
Offer Groups: These offers are grouped by topic or theme. For example, offers with free shipping will be in one group.
Type: These offers are organized by the type of unit or vehicle they pertain to.
Category: Categories are based on the products in ecommerce catalogs.
- Once you drill down to the slide you wish to add, click the + Add To Offer Queue button.
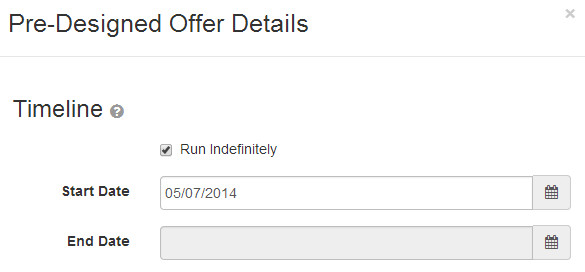
- Adjust the timeline to your desired settings. This will default to "Run Indefinitely."
- Start Date - This is the first day your promotion will appear on your website. It will appear at the very beginning of this day.
- End Date - This is the final day your promotion will appear on your website. It will be removed at the very end of this day.
- Note: The beginning and ending of a day is determined in Central Time.
- Adjust the Banner Link field to your desired setting. If you want site visitors to be able to click on the slide and be taken to another page within or outside of your website, enter the website address for that page here. All offers will include a suggested link allowing you to skip this step.
- Click Save Offer. From the drop down menu in the upper-right corner of the ARI CMS, click Publish Changes.
Custom Offers are slides that you've created on your own and would like to upload for use on your website.
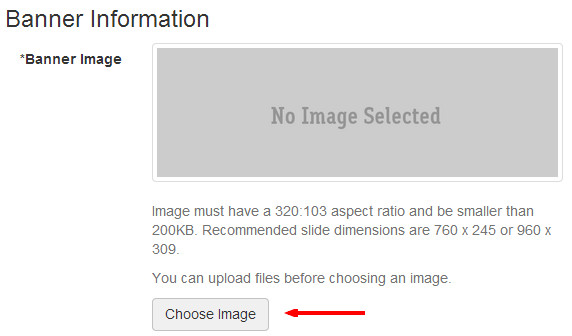
Custom offers require you to provide an image that you've created or acquired from an external library. Custom offer images must have a 320:103 aspect ratio to display properly on your website. Recommended image dimensions are 760x245 or 960x309 (pixels). Lastly, custom offer image files must be smaller than 200 KB.
- Go to Site > Offers
- From the Add Offer To Queue section, select Custom Offer.
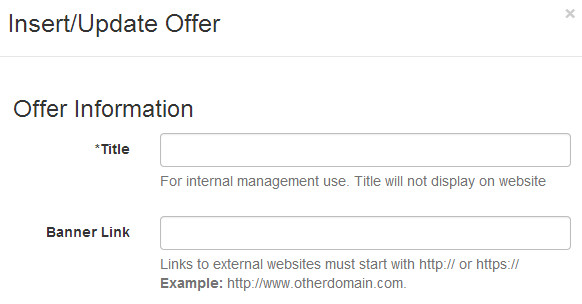
- Complete the Offer Information section.
- Title: The title of the offer will only appear within the Merchandising Offer Manager section of the Command Center.
- Banner Link: If you want site visitors to be able to click on the slide and be taken to another page within or outside of your website, enter the website address for that page here.
- Adjust the timeline to your desired settings. This will default to "Run Indefinitely."
- Start Date - This is the first day your promotion will appear on your website. It will appear at the very beginning of this day.
- End Date - This is the final day your promotion will appear on your website. It will be removed at the very end of this day.
- Note: The beginning and ending of a day is determined in Central Time.
- In the Banner Information section, click the Choose Image button.
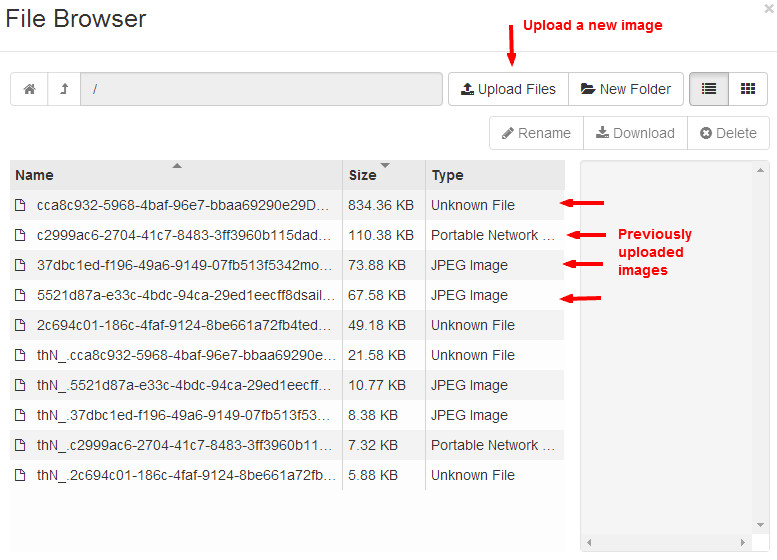
- Images your have previously uploaded will display in the File Browser. If your desired image is already listed, proceed to Step 7. If you'd like to upload a new image from your computer, click the Upload Files button.
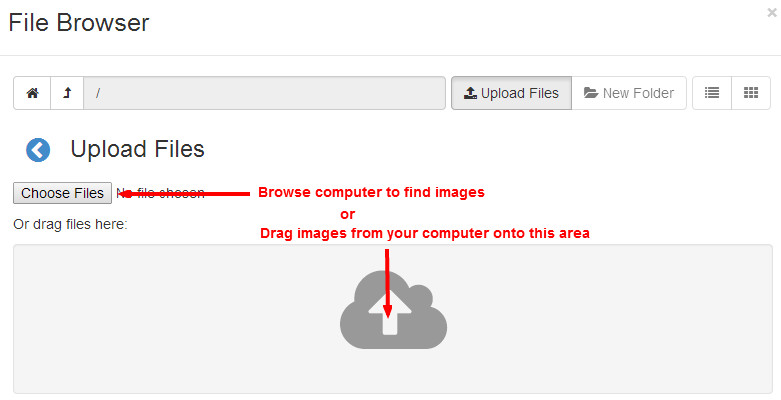
- If you're uploading a new image, click Choose Files to browse your computer or drag them from your desktop onto the Upload icon.
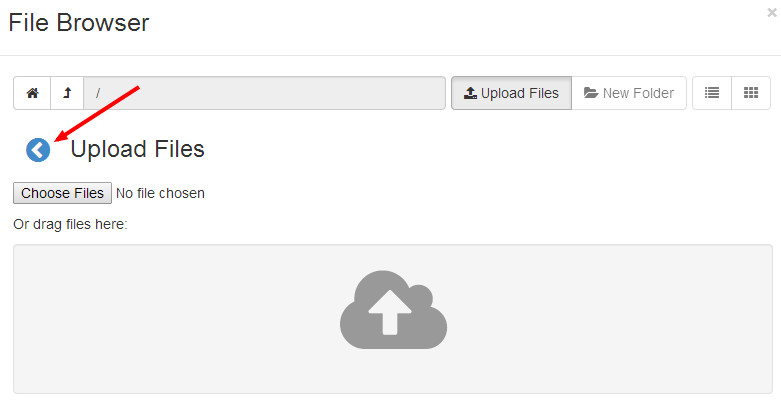
- When complete, click the blue arrow next to Upload Files to return to the File Browser.
- If you're uploading a new image, click Choose Files to browse your computer or drag them from your desktop onto the Upload icon.
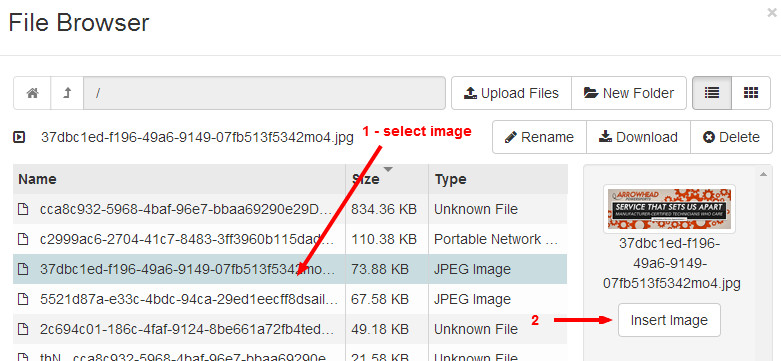
- Select the image you'd like to use and click the Insert Image button.
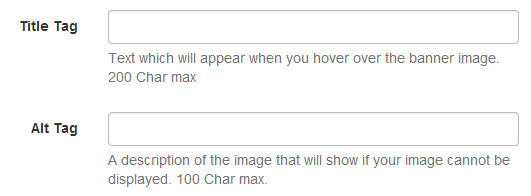
- Adjust the title tag and alt tag text fields to your desired settings. Both are recommended for SEO best practices.
- Title Tag: Text which will appear when you hover over the slide (200 char. max).
- Alt Tag: A description of the image that will show if your image cannot be displayed (100 char. max).
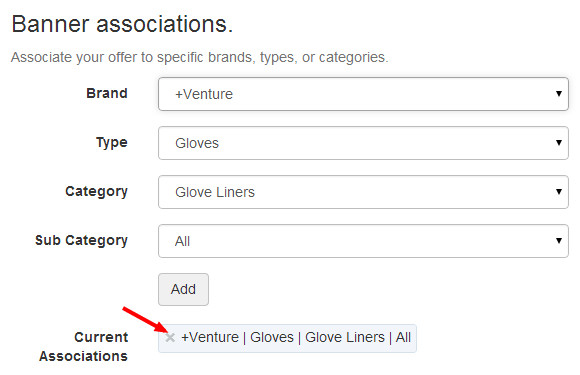
- Optional: Adjust the Banner Associations to the appropriate settings. A series of dropdown menus allows you to associate your offer to a brand, vehicle/unit type, ecommerce category, and ecommerce subcategory. Slides can have multiple associations, and associations can be removed by clicking on the X in the Current Associations section.
- Click Save Offer. From the drop down menu in the upper-right corner of the ARI CMS, click Publish Changes.
Related Articles
