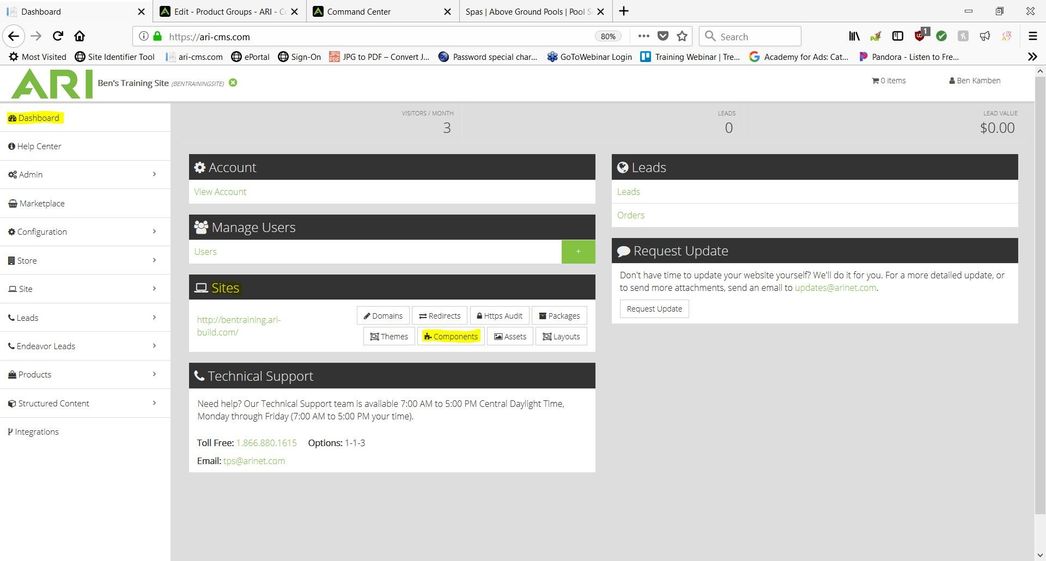
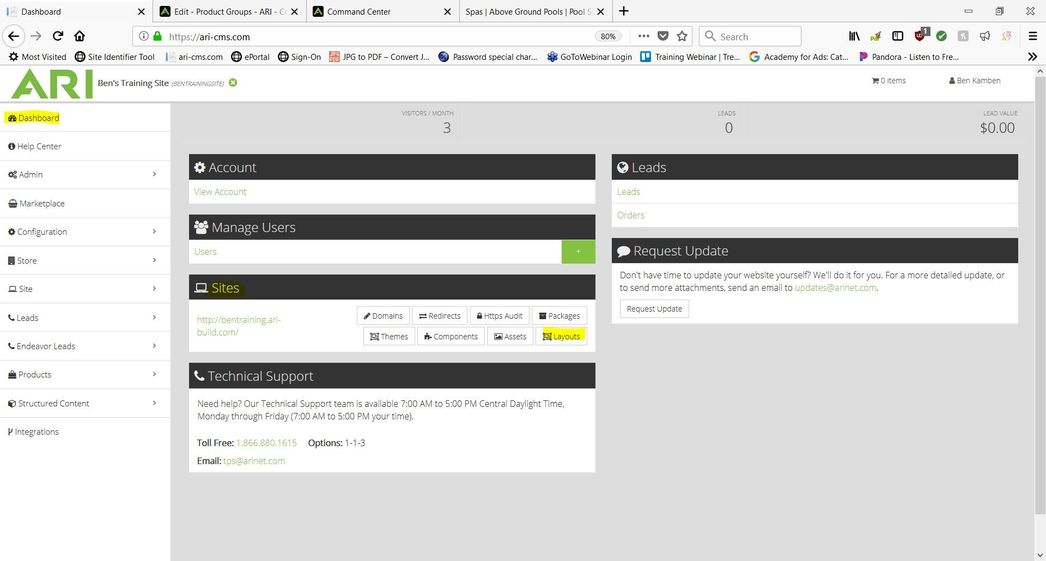
- From the Dashboard of your CMS editor click Products, Product Groups.

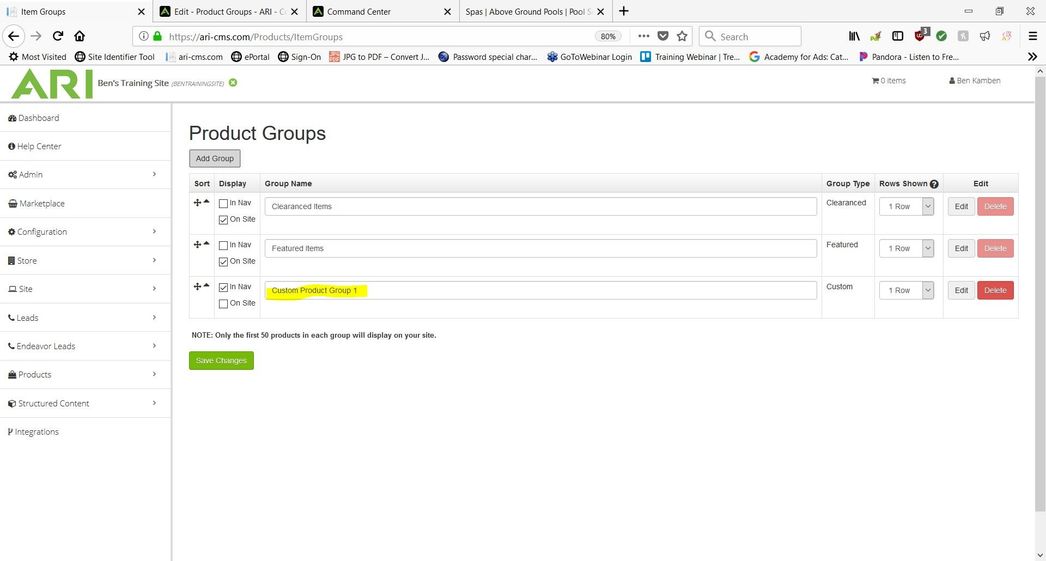
2. Near the top left of the Product Groups page click Add Group.
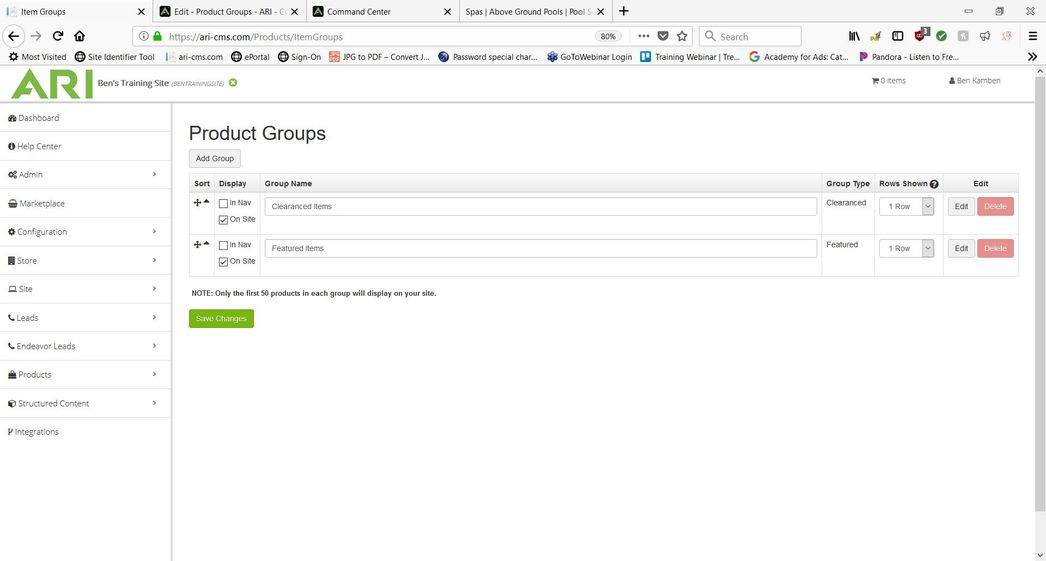
3. Click into the Group Name field to rename the Product Group you have created.
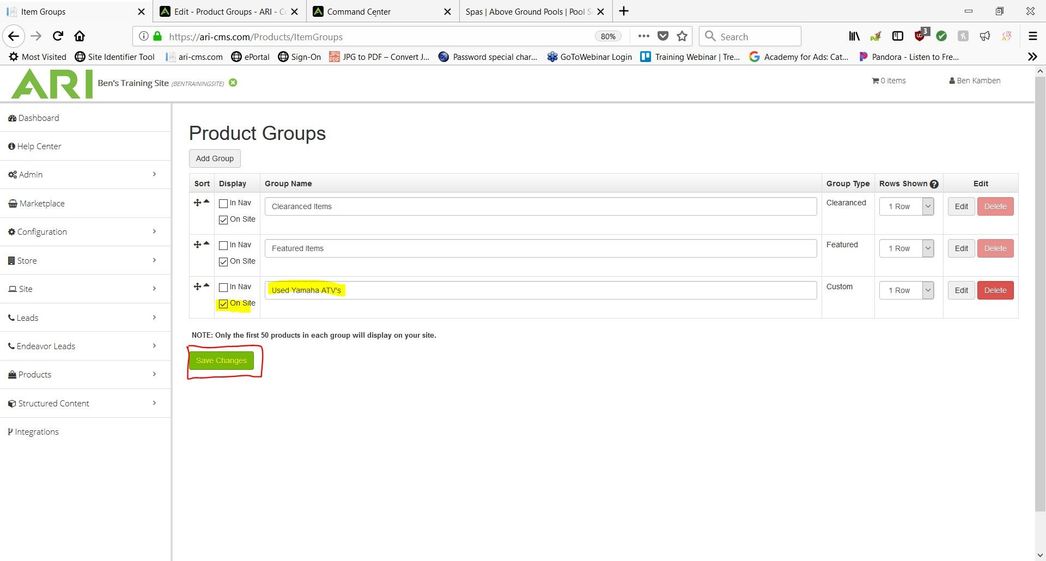
4. For this example we will name the product group "Used Yamaha ATV's". Make sure that the On Site check box is checked in the Display column. Click Save changes.
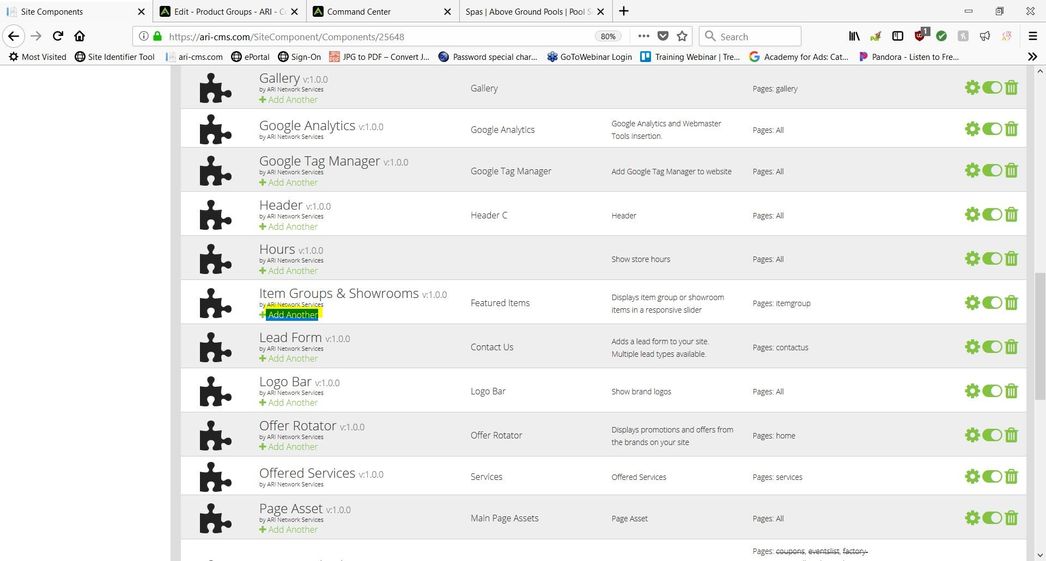
5. Click Dashboard in the upper left hand corner. Under Sites click Components.
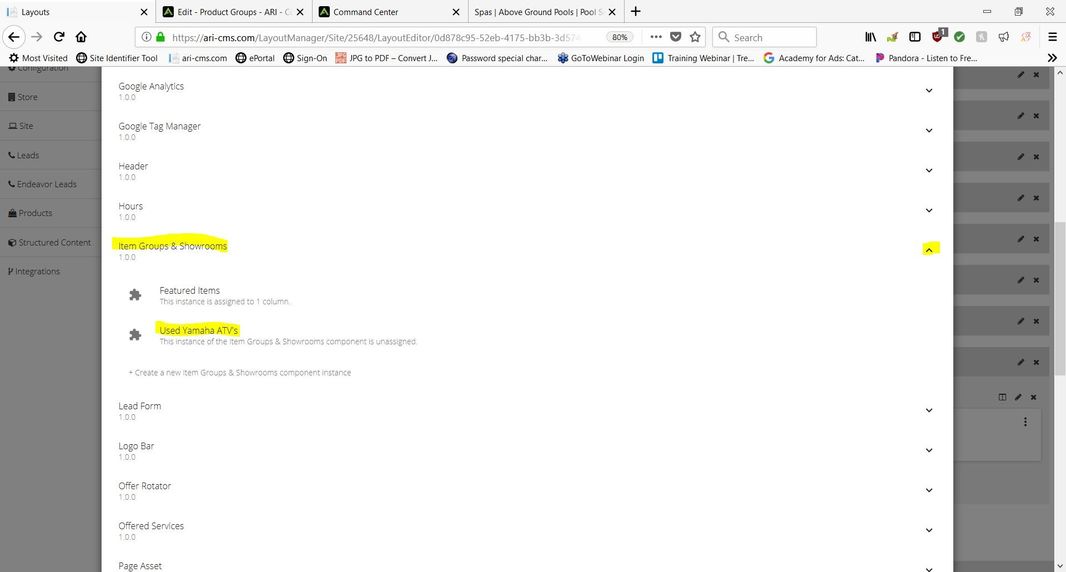
6. Scroll down until you see a component titled Item Groups & Showrooms. Under the Item Groups & Showrooms text click + Add Another.
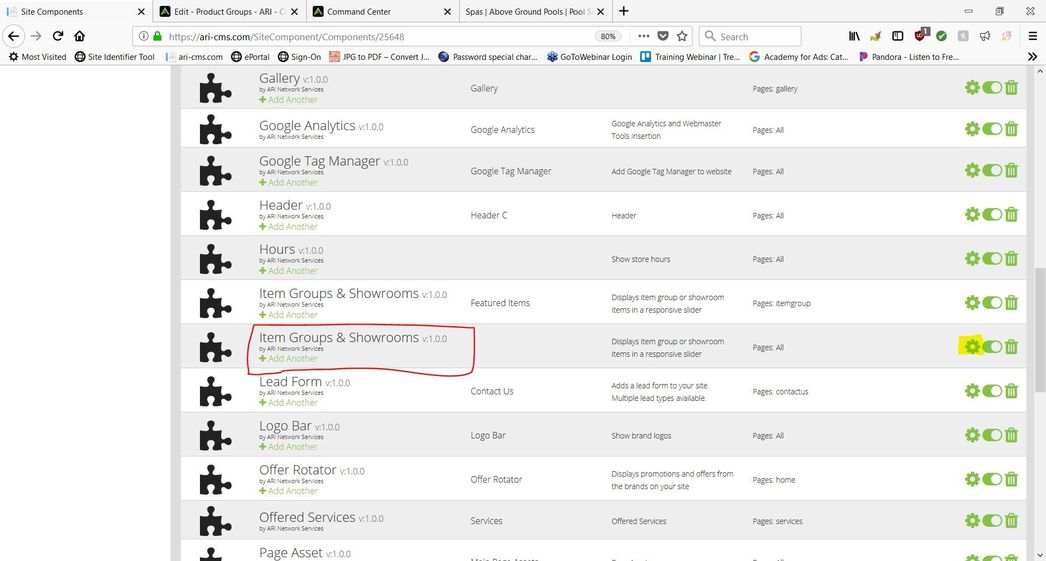
7. A new Item Groups & Showrooms component will be created directly below. To the far right of the unassigned Item Groups & Showrooms component click on the green gear.
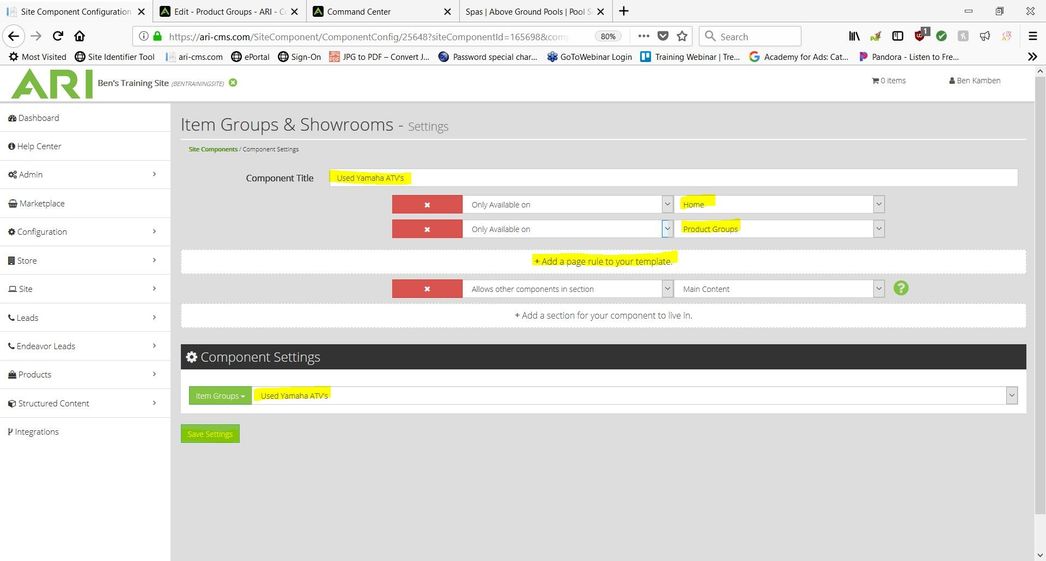
7. Name the component by typing Used Yamaha ATV's in the Component Title text field. Click + Add a page rule to your template. Assign the first drop down field to Only Available On and the second field immediately to the right to say Home.
Click + Add a page rule to your template again Assign the first drop down field to Only Available On and the second field immediately to the right to say Product Groups. Under the large black bar titled Component Settings select Used Yamaha ATV's from the drop down menu. Click Save Settings.
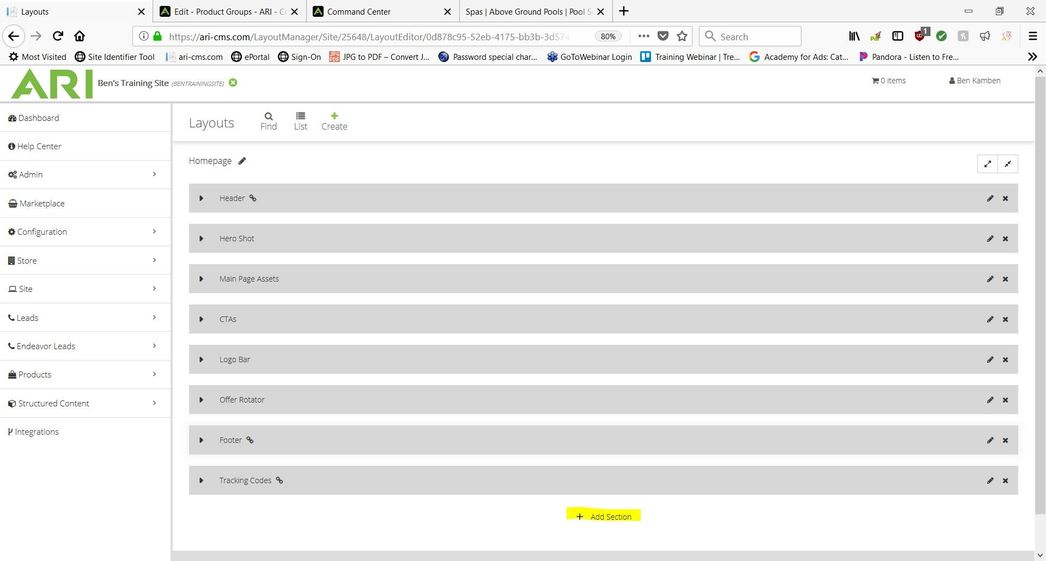
8. Click Dashboard in the upper left hand corner. Within the box titled Sites click Layouts.
9. At the top left of the Layouts page click Homepage (1 pages) .

10. At the Bottom Center of the Layouts page click + Add Section.
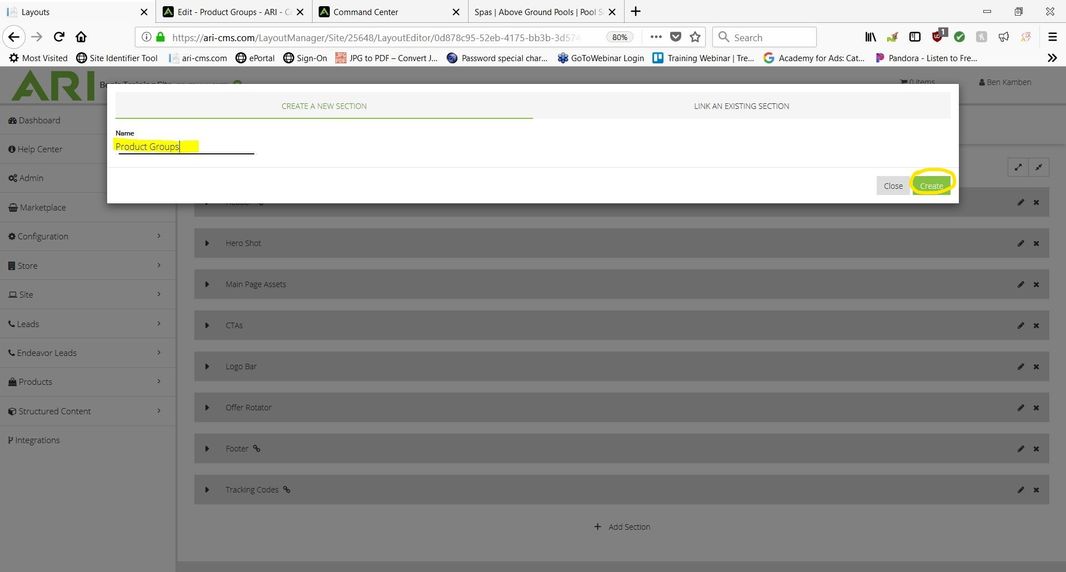
11. Name the section Product Groups. Click Create in lower right hand corner.
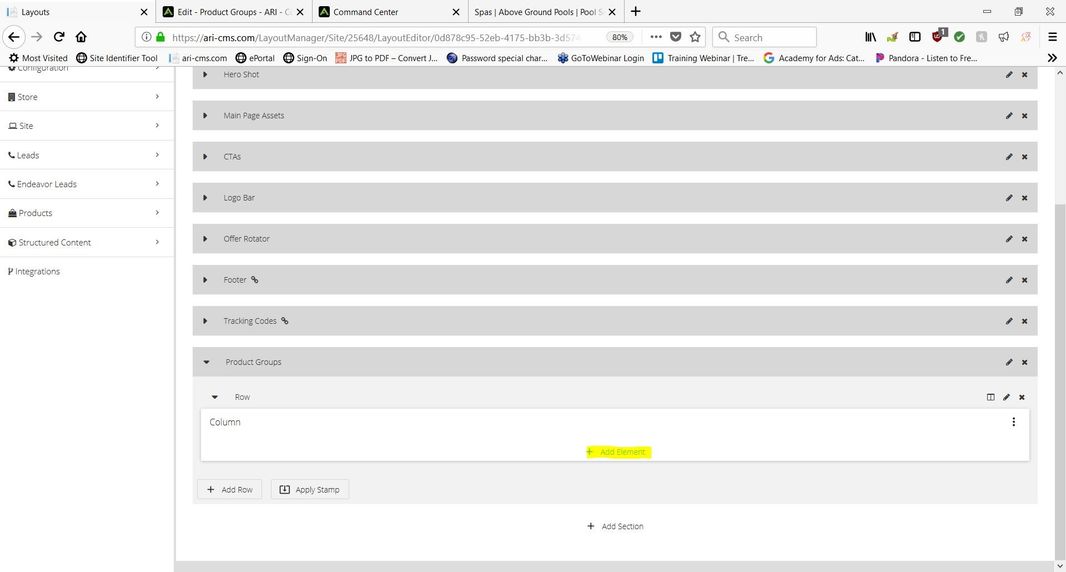
12. Click on the arrow to the left of Product Groups. Then the arrow to the Left of Row. Select single column full width, the option to farthest most left.

11. In the bottom center of the Product Groups row click + Add Element.
12. Scroll down the list of available elements. Click on Item Groups & Showrooms. Click Used Yamaha ATV's.
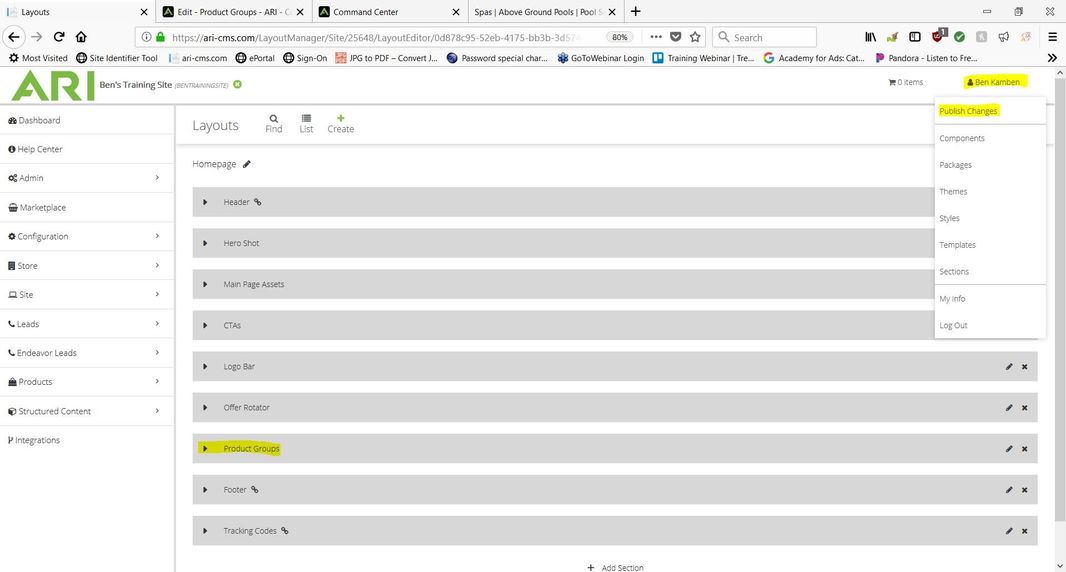
13. Click and drag the Product Groups row so that it is just above the row marked Footer. Click on your name in the upper right hand corner and click Publish Changes.
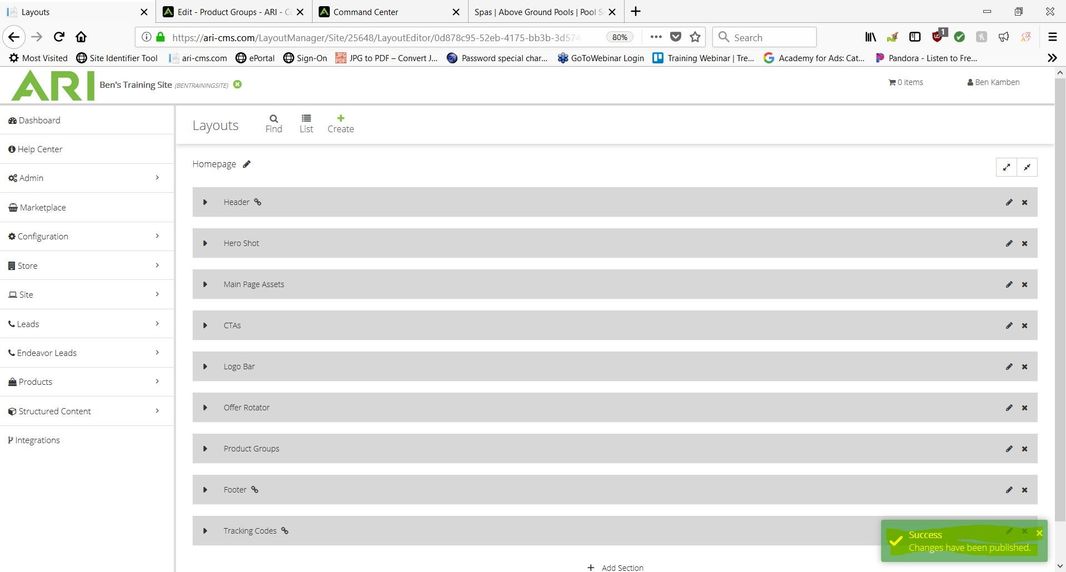
14. Success.
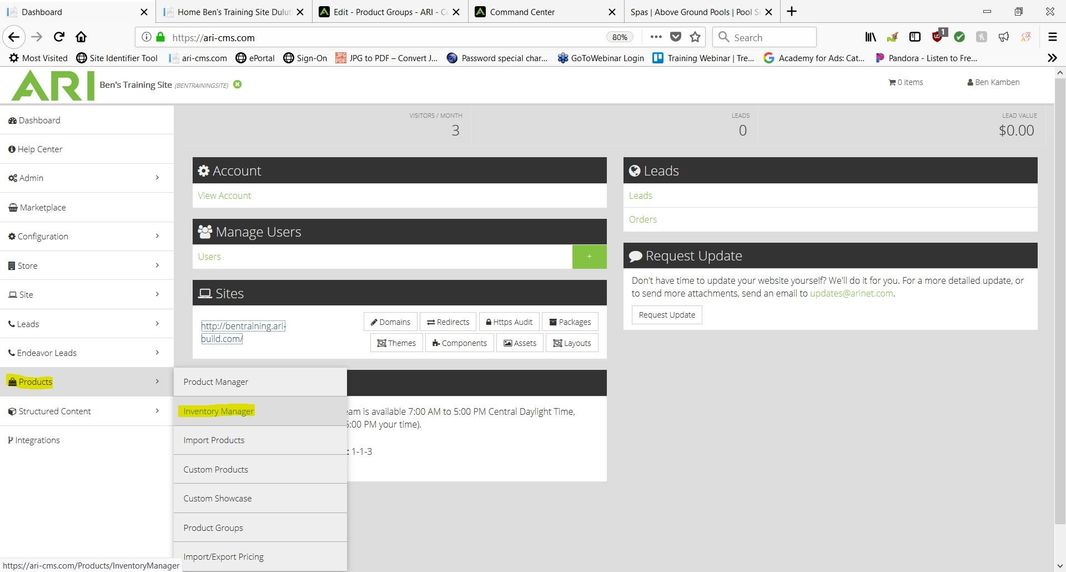
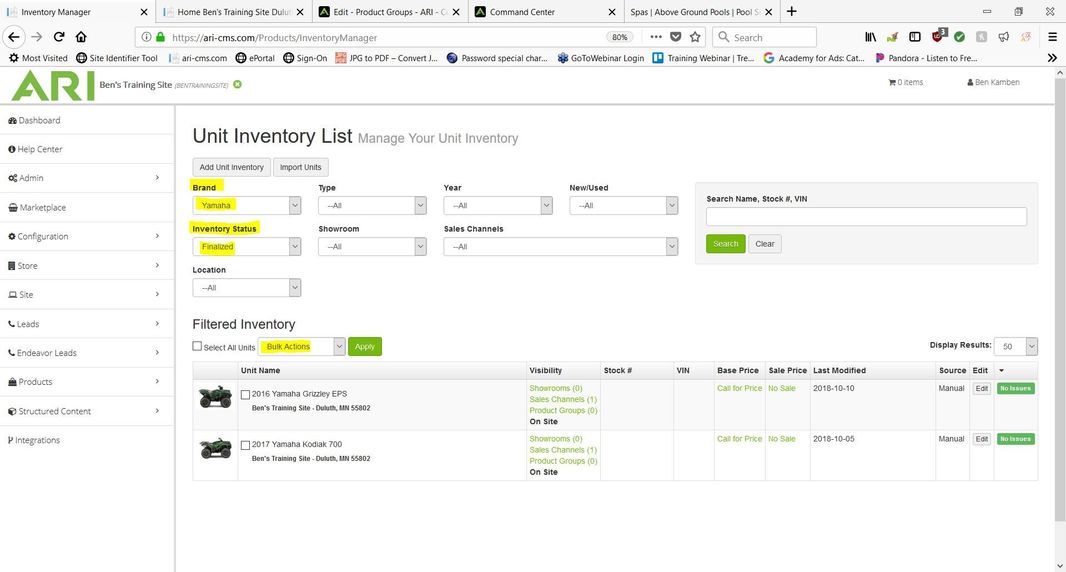
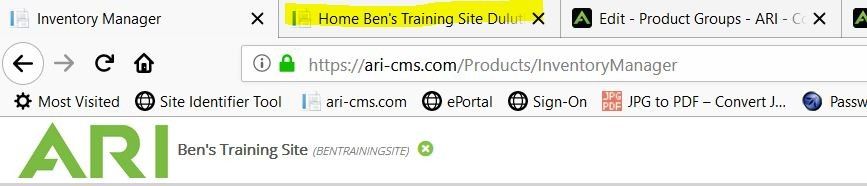
15. In the left hand menu click Products. Click Inventory Manager.
16.In the Brand drop down menu click Yamaha. In the Inventory Status drop down menu click Finalized.
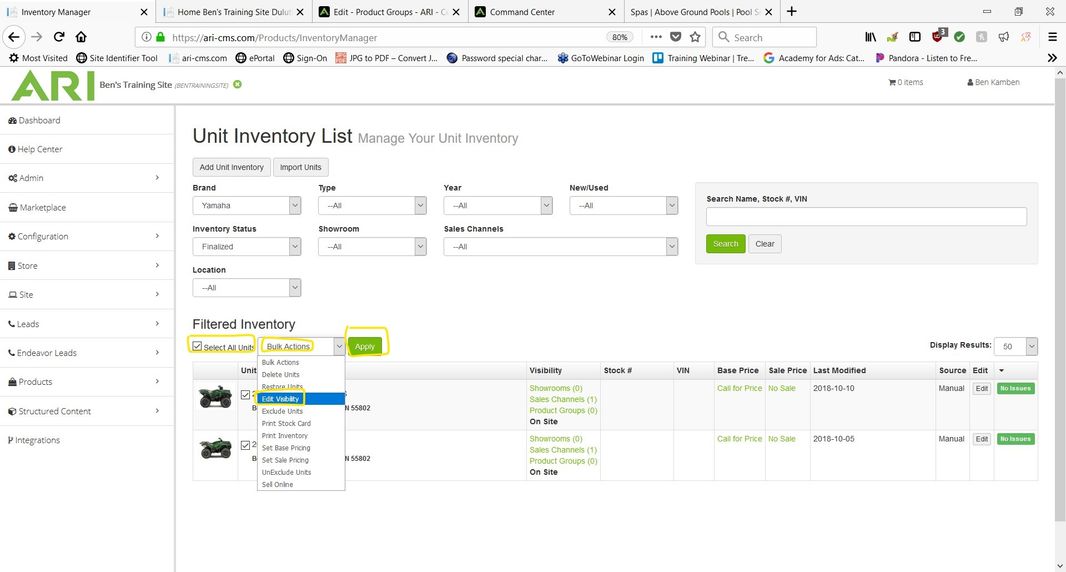
17. Check the check box marked Select All Units. Click the Bulk Actions Menu and click Edit Visibility.
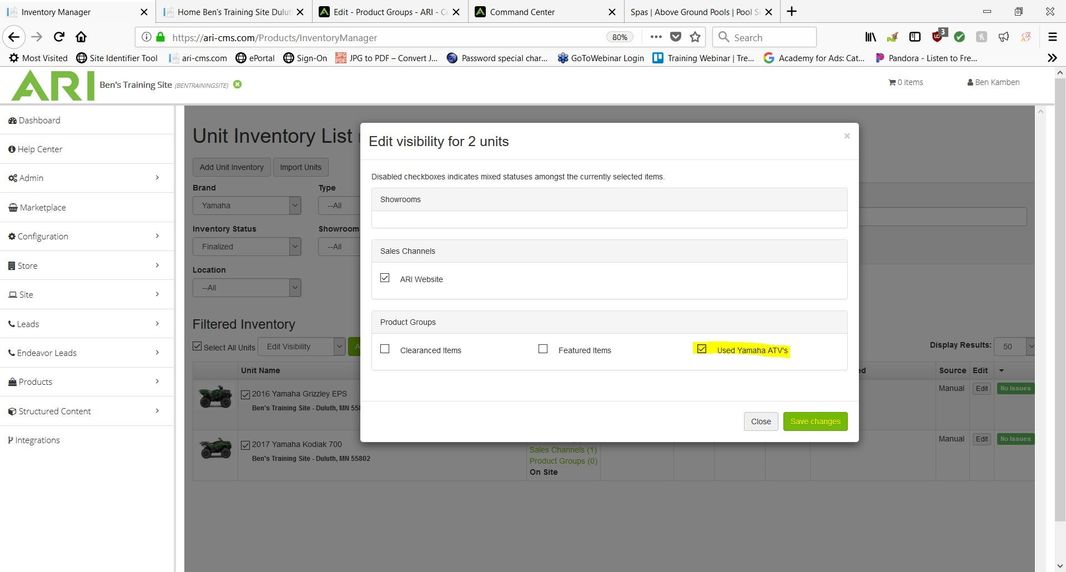
18. Check the Used Yamaha ATV's check box with in the Product Groups box. Click Save Changes.
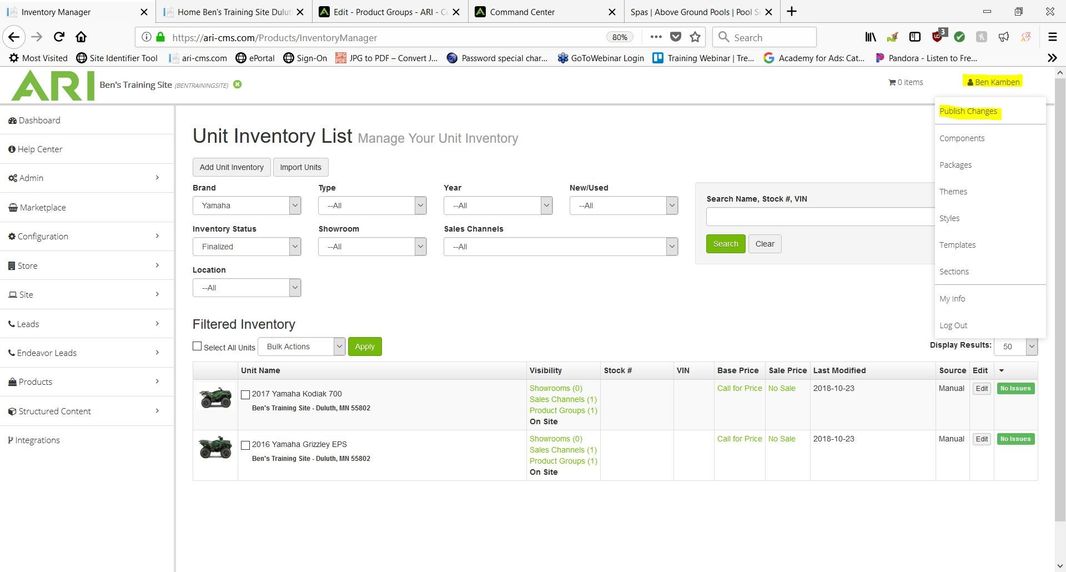
19. In the upper right hand corner click on your name. Click Publish Changes.
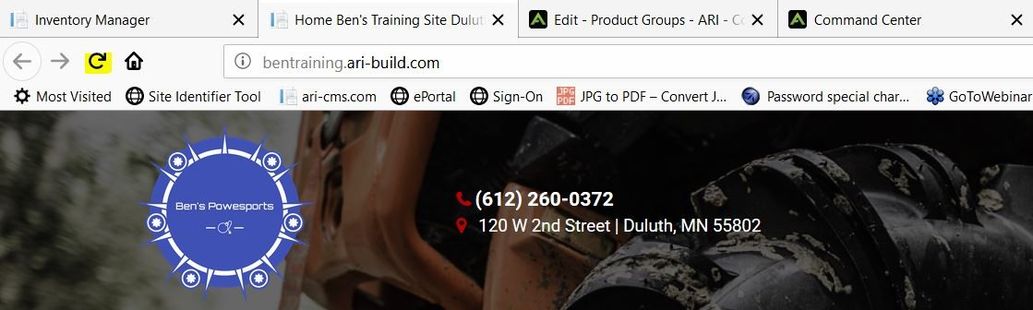
20. At the top of your internet browser click the tap that displays your website.
21. To the left of your address bar click the refresh page arrow.
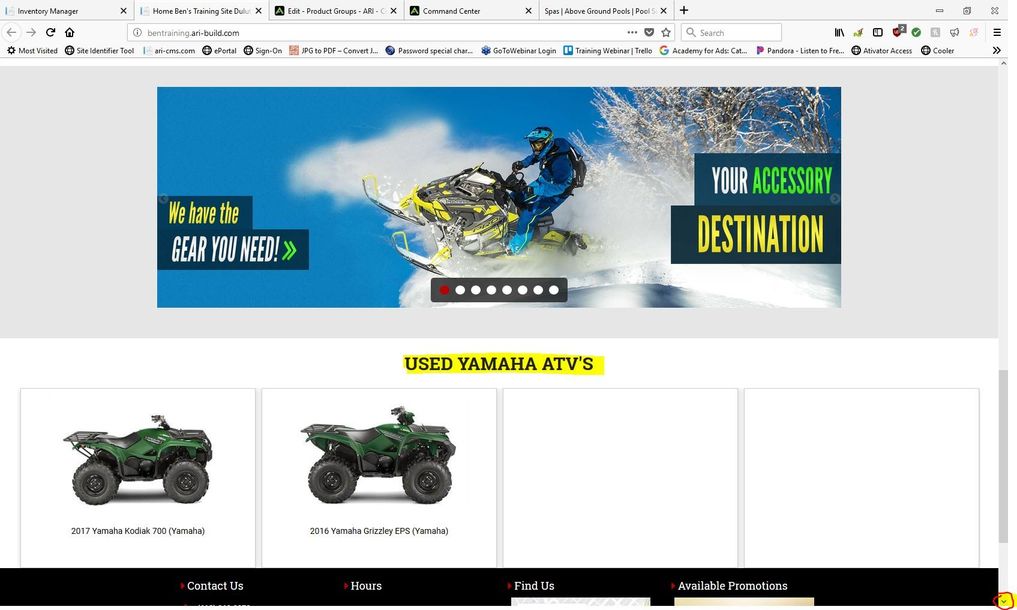
22. Scroll to the bottom of your website. The Used Yamaha ATV's product group should now be visible just above the footer.