...
- To start, select Manage Unit Inventory from the Quick Links section on the Command Center Dashboard. Alternatively, you could search for "Inventory Manager" in the Command Center search bar and choose the "Inventory Manager | Admin" suggestion.
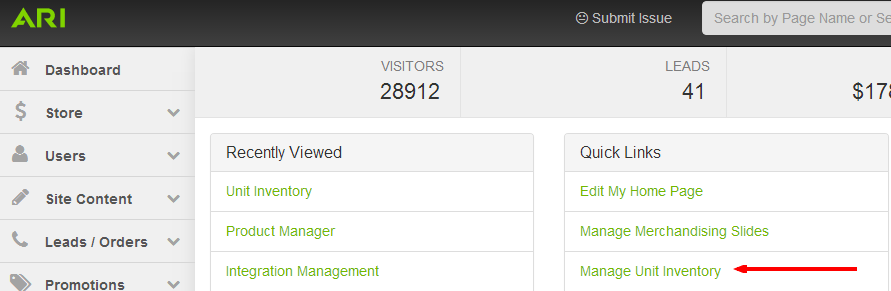
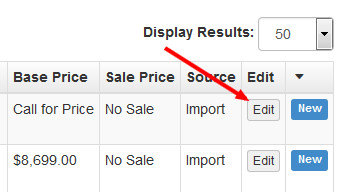
- Inventory that has not been finalized will show with a blue New label in the far right column. To begin the finalization process, click the Edit button.
- If you also have units that you have added manually, you will be presented with two options: Create a New Unit Inventory Item and Associate to Existing Unit Inventory Item. Otherwise, skip to the next step.
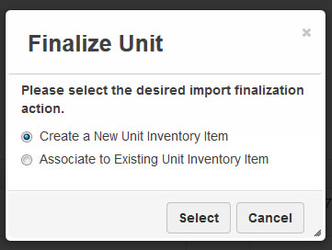
- Choose Create a New Unit Inventory Item if the item you are finalizing is not a duplicate of an item manually added previously.
- Choose Associate to Existing Unit Inventory Item
- if the item you are finalize was also added manually. This will allow you to link them together as one unit, retaining your custom description and images that have already been customized for the unit.
- Find the unit that you want to link this one to from the list provided and click the Link button.
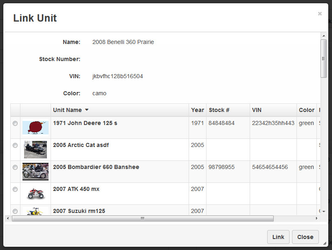
- Find the unit that you want to link this one to from the list provided and click the Link button.
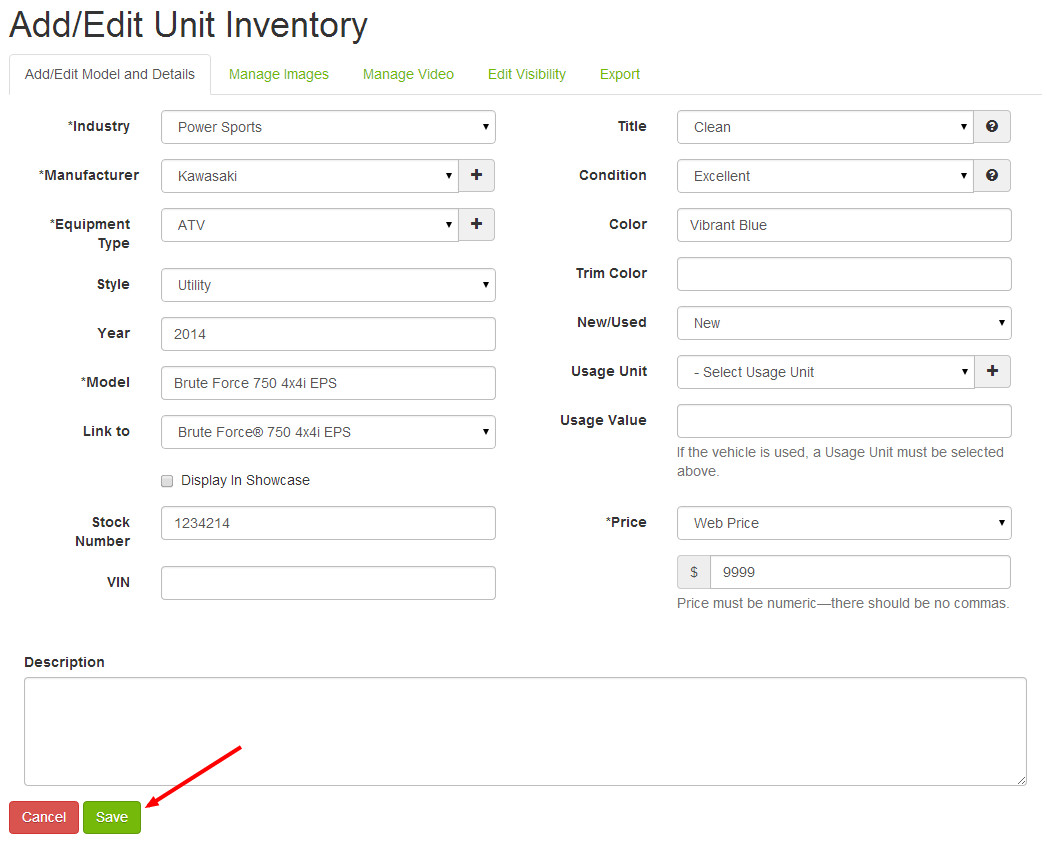
- You are now on the Add/Edit Unit Inventory screen. As you finalize units, the Endeavor system will learn the associations between what code was sent via your DMS and what you chose in the dropdown. On subsequent units with those same codes, the system will automatically map the information on the Add/Edit screen, making finalizing take less time as you continue to use the toolset. If you'd like to attach manufacturer descriptions and images to the unit automatically, you'll need to input a year and select the appropriate model from the Link to field. When you're finished adding details, click Save.
Click the Manage Images tab to add images to your inventory listing. If you do not wish to add images, skip to Step 6 below.
Use the Add Stock Images button to select manufacturer photos (if available), or use the Add Custom Image(s) button to select images from your computer.
When you have finished adding images, click Save.
Click the Manage Video tab to add a YouTube video URL to your inventory listing. Instructions for this step are included on the page. If you do not wish to add a video, skip to Step 8 below.
When you've finished adding a YouTube video URL, click Save.
Click on the Edit Visibility tab to manage the syndication of your inventory listing.
From this screen, you can control the syndication of your inventory listing. You can assign it to showrooms, push it to sales channels, add it to a product group, or add a sale banner. The system will default to include your listing on all available sales channels.
When you have finished editing visibility, click Save.
If you have no further edits to make to this unit listing, click Back to return to the Unit Inventory List screen.
When you have finished adding units, click Publish Changes and Publish Keywords from the Website dropdown menu in the upper-right corner of the Command Center - The remaining steps are the same as if you had added the unit manually. You can find further instructions within the help article for adding and removing units.
Related Articles
| Filter by label (Content by label) | ||||||||||||||||||
|---|---|---|---|---|---|---|---|---|---|---|---|---|---|---|---|---|---|---|
|