ARI Responsive Websites
Adding & Editing Custom Brochures
You can create a custom showcase for products or brands that have not been pre-loaded into the Command Center. Your custom showcase will display on your website side-by-side, in a similar format, as the pre-loaded showcase catalogs.
Adding a Custom Brochure (aka Showcase) Catalog
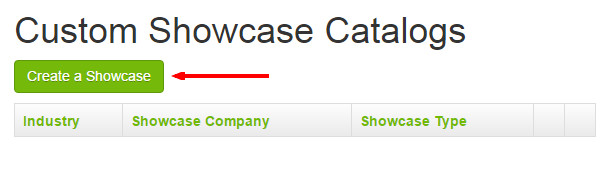
Go to Products > Custom Showcase. On the Custom Showcase Catalogs page, select Create a Showcase.
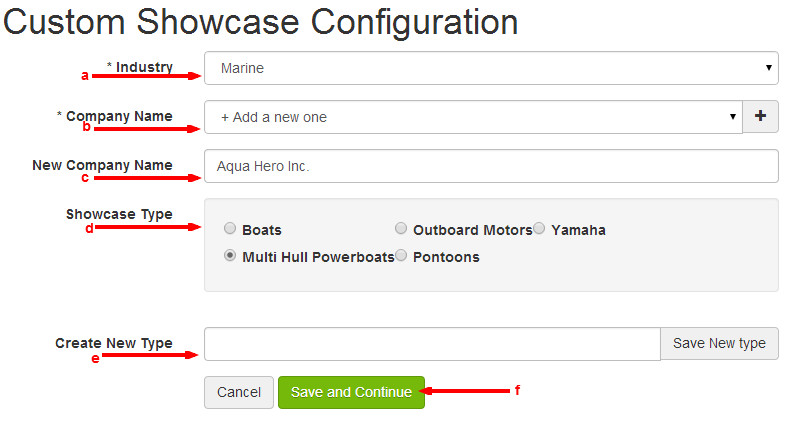
Enter the following information on the Custom Showcase Configuration page:
Industry: Choose the industry that best applies to the hard good products that you will be entering into this catalog.
- Company Name (Required): Click into this dropdown list and choose the desired product manufacturer from the alphabetical dropdown list. If the manufacturer is not present, you can add one by selecting +Add a new one at the very top of the dropdown list.
New Company Name: If you selected + Add a New One in step 3b, enter the appropriate information into the New Company Name field.
Showcase Type: This radio menu is populated by the Industry that you selected in step 3a. Choose the one that best applies to the hard good products that you will be entering into this catalog.
Create New Type: If the existing list of Showcase Types doesn't include a good option, you may create your own type by entering it here.
Select Save and Continue.
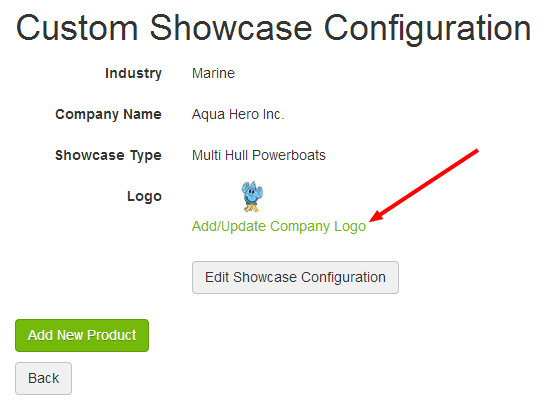
- The Custom Showcase Configuration page will update to show the info that you've entered, with an option to add a logo. To add a logo, select Add/Update Company Logo.
- One you have your catalog configured, select Add New Product.
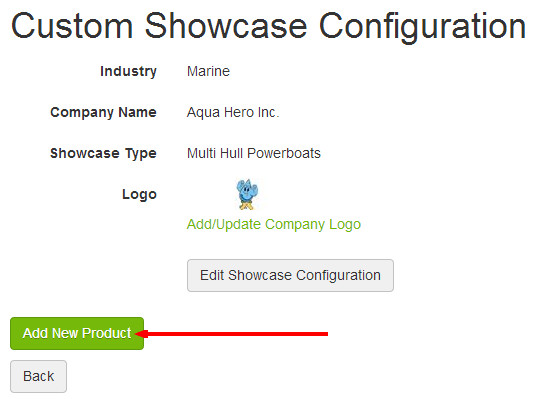
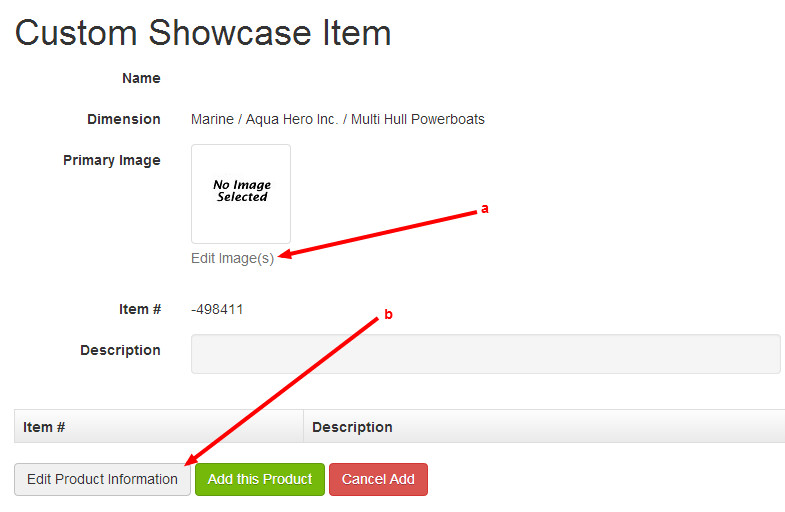
- You will be taken to the Custom Showcase Item page.
- If you wish to add one or more product images, select Edit Image(s) and upload the image files from your computer.
- To continue adding product information, select Edit Product Information.
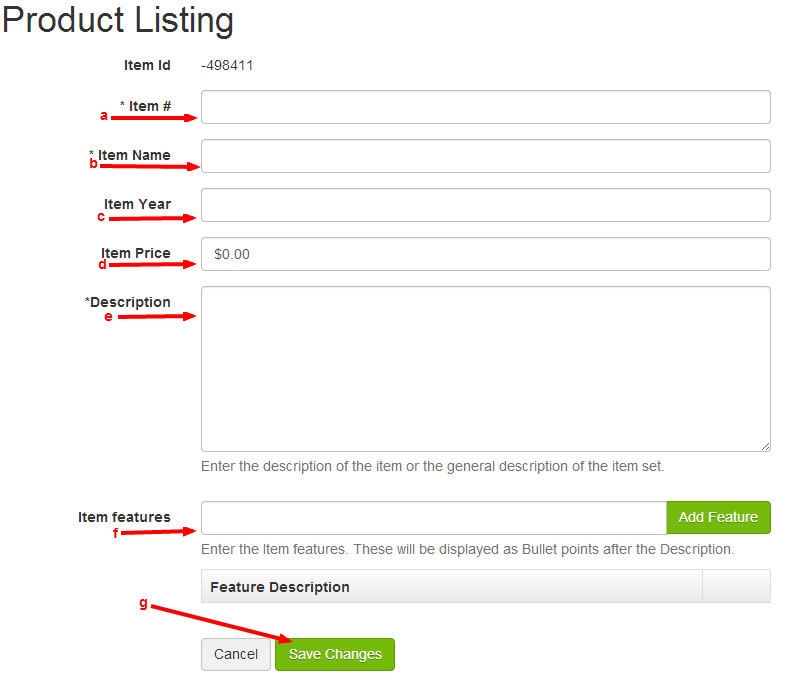
- On the Product Listing page, enter the following information:
- Item # (Required): Enter a unique product ID.
- Item Name (Required): Enter the name of the hard good product.
- Item Year: Enter the model year.
- Item Price: Enter the product price.
- Description (Required): Enter the product description.
- Item Features: Enter particular features—selling points—that will display to your customers as product feature bullet points following your description text. As you finish typing each item, click the Add Feature button. Your newly-added feature will be displayed in the Feature Description table. You may add unlimited bullet-point features by clicking the Add Feature button after each entry. You may also use the arrows to modify the sequence in which the bullet points will appear on your website product pages.
- Select Save Changes.
- If you wish to continue adding hard good products to your catalog, select Back to Product list and repeat steps 5 through 8 as necessary. Otherwise, return to the main menu and click to expand the Store menu. Select Catalog Manager > Catalog Manager.
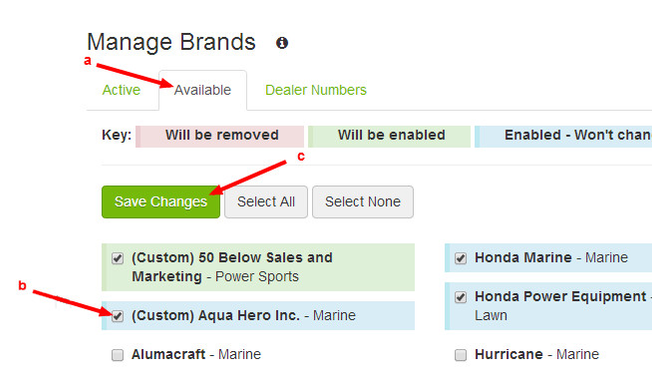
- Locate and activate your custom catalog:
- Select Available in the tab menu beneath the Manage Brands title. Your catalog title will be preceded with the word (Custom).
- Select the corresponding check box for your catalog.
- Select Save Changes.
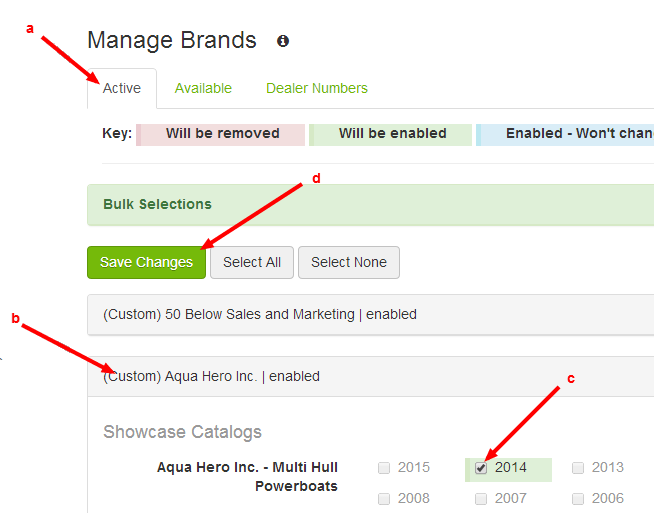
- Now that your catalog is active, you must enable the catalog years that apply to the products you've entered.
- Select Active in the tab menu beneath the Manage Brands title.
- Locate your custom catalog in the Bulk Selections section of the page. The catalog title will be preceded with the word (Custom). Click to expand.
- Select the catalog year (or years) that apply.
- Select Save Changes, then select Publish Changes in the top-right header menu
Related Articles