his This guide demonstrates the process for adding a custom page your your site.
Step-by-Step Guide
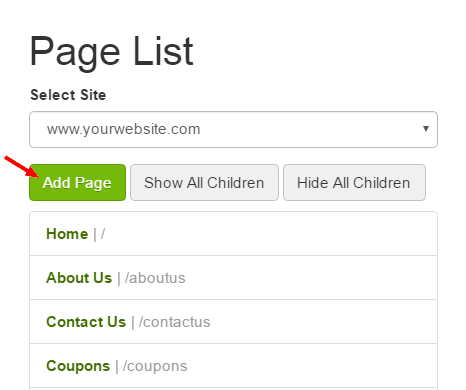
1. In the primary menu, navigate to Site > Pages to be taken to the Page List. Click Add Page.
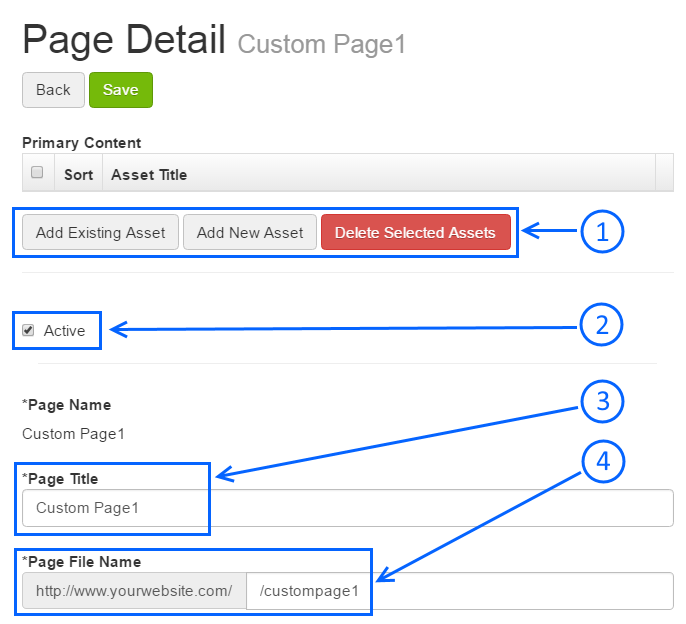
2. You will be directed to the Page Detail page which contains these fields:
1. Add (or Remove) Asset(s)
Assets are containers for custom page content. When you create a custom page, you will need to add one or more assets in order to add content to your new page. For more information on adding content, please see Assets.
2. Active
Pages that are active will be displayed on your site. If you de-select the Active check box, your page will not be visible to your customers. A check mark in the box indicates that the page is active.
3. Page Title
This title will appear at the top of the content area when your customers view the new page. Think of it as an overall header for the content on that page.
4. Page File Name
This value is used as the page name that is appended to your website address (Uniform Resource Locator, or “URL”) for that page. Example: If you are creating a new page for rentals, you could enter “rentals” as the Page File Name. The resulting URL would be http://www.yourwebsite.com/rentals
| Info |
|---|
When you first create a new page, the page is given a default title of "Custom Page1" and a default page file name of "/custompage1", and subsequent page additions use the default name of Custom Page combined with the next number in sequence (Example: Custom Page2 & www.yourwebsite.com/custompage2). It's preferable that you enter a Page Title that reflects the content of your page, and not use the default page title. |
Related Articles
| Filter by label (Content by label) | ||||||||||||||||||
|---|---|---|---|---|---|---|---|---|---|---|---|---|---|---|---|---|---|---|
|