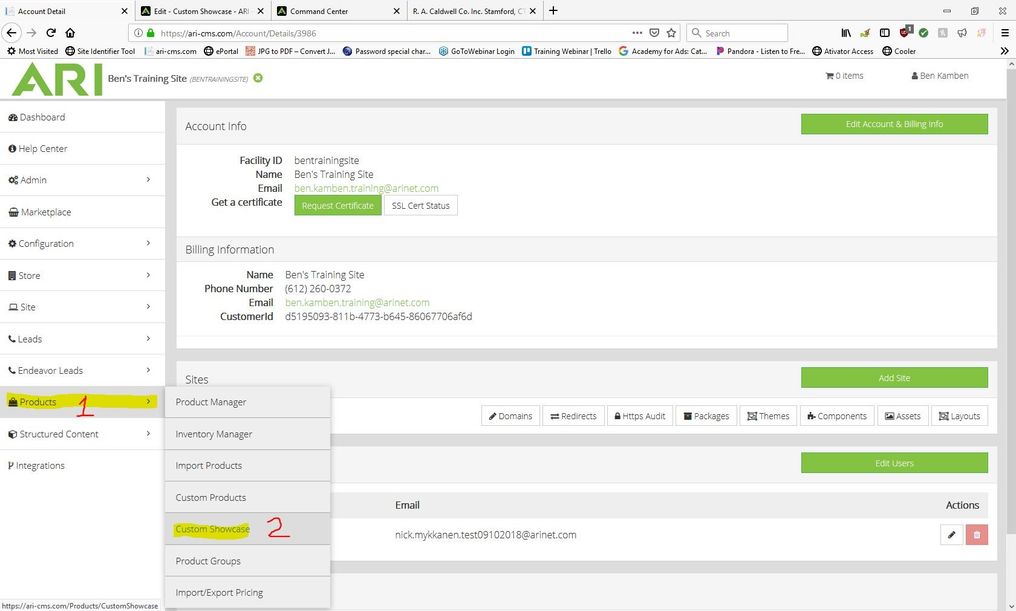
- From the CMS Dashboard click Products. Click Custom Showcase.
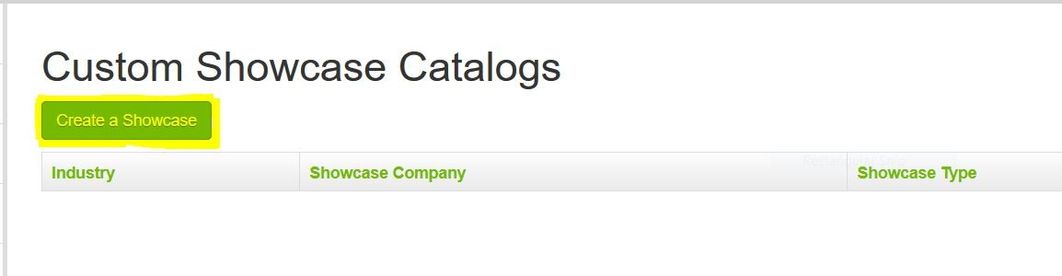
2. Click Create a Showcase.
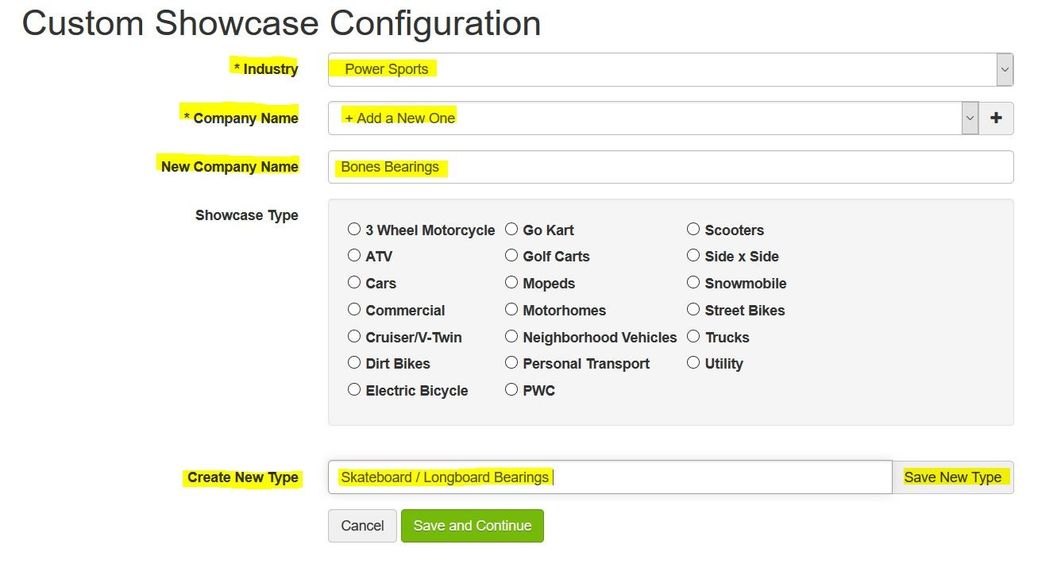
3. Click the *Industry drop-down menu and click Power Sports. Click the *Company Name Drop-down menu. Click + Add a New One. In the New Company Name text field that appears Type Bones Bearings. In the Create New Type text feild type Skateboard / Longboard Bearings. Click Save New Type to the far right of Create New Type.
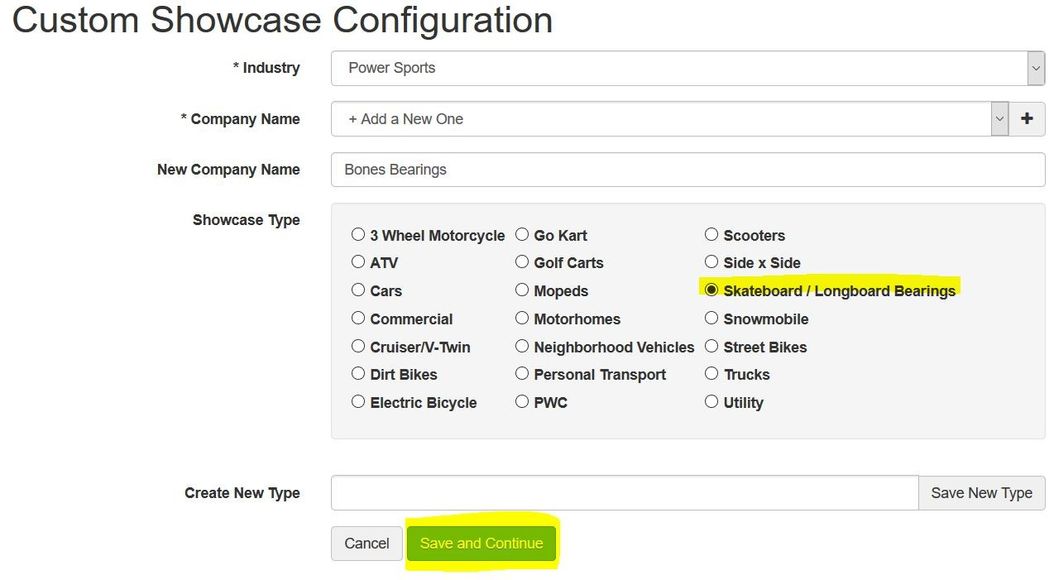
4.You will notice the new Showcase Type appears in the menu and is selected for you. On the bottom center of the page Click the green Save and Continue Button.
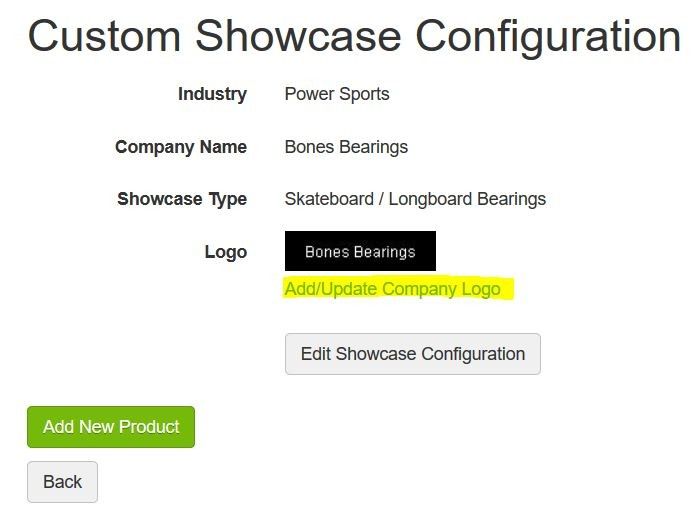
5.To the right of Logo click Add / Update Company Logo.
6. This small box will appear on your screen. Click Browse.
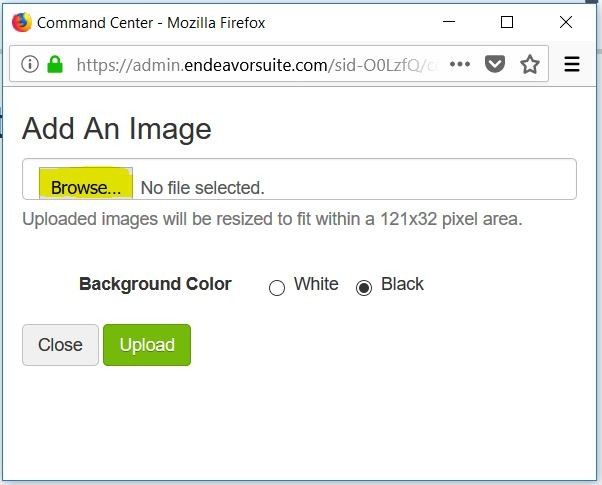
7. Select you logo image so that it is highlighted in blue. Click Open in lower right corner.

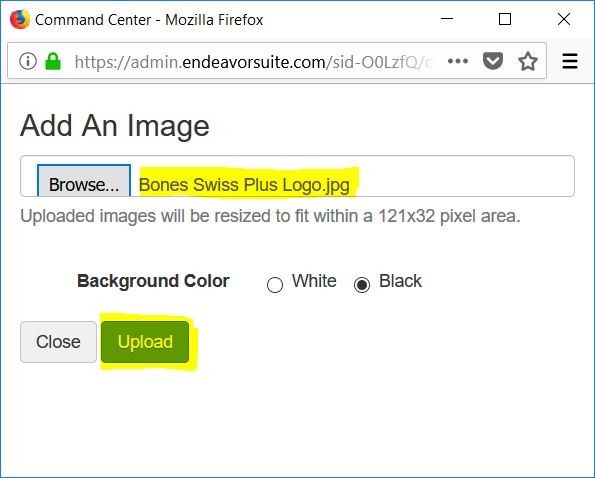
8. You will notice your logo's file name to the right of Browse button. Click Upload in lower left corner.
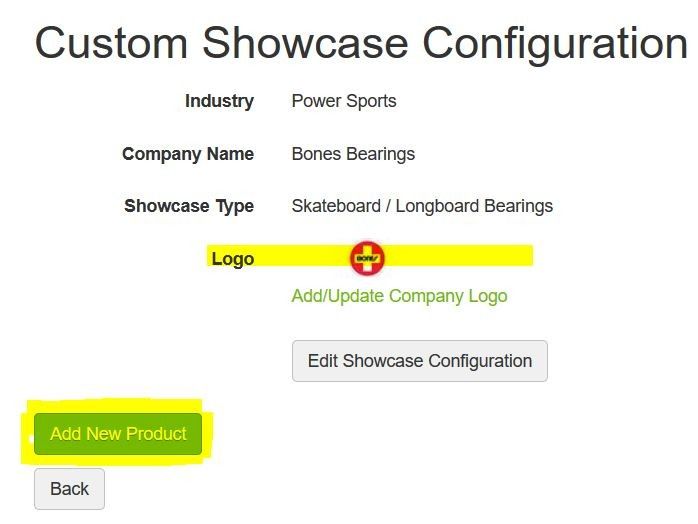
9. A small preview version of your logo will be inserted to the right Of Logo. Click Add New Product in lower left corner.
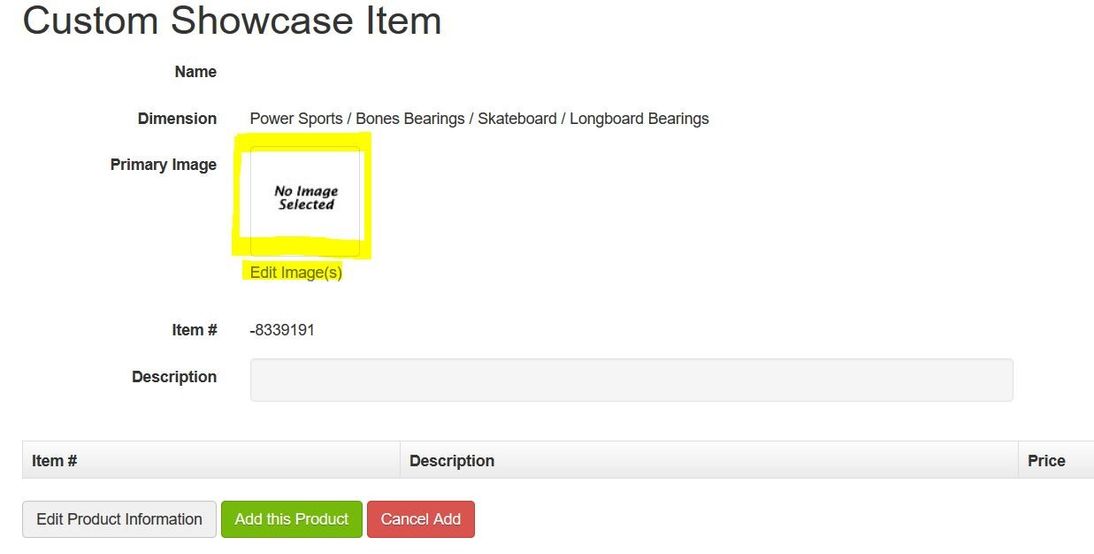
10. On the Custom Showcase Item page click Edit images to the right and slightly below Primary Image.
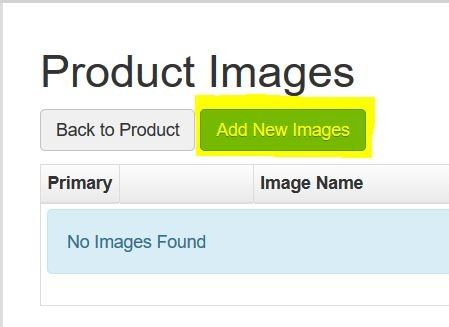
11. On Products Images Page click Add New Images.
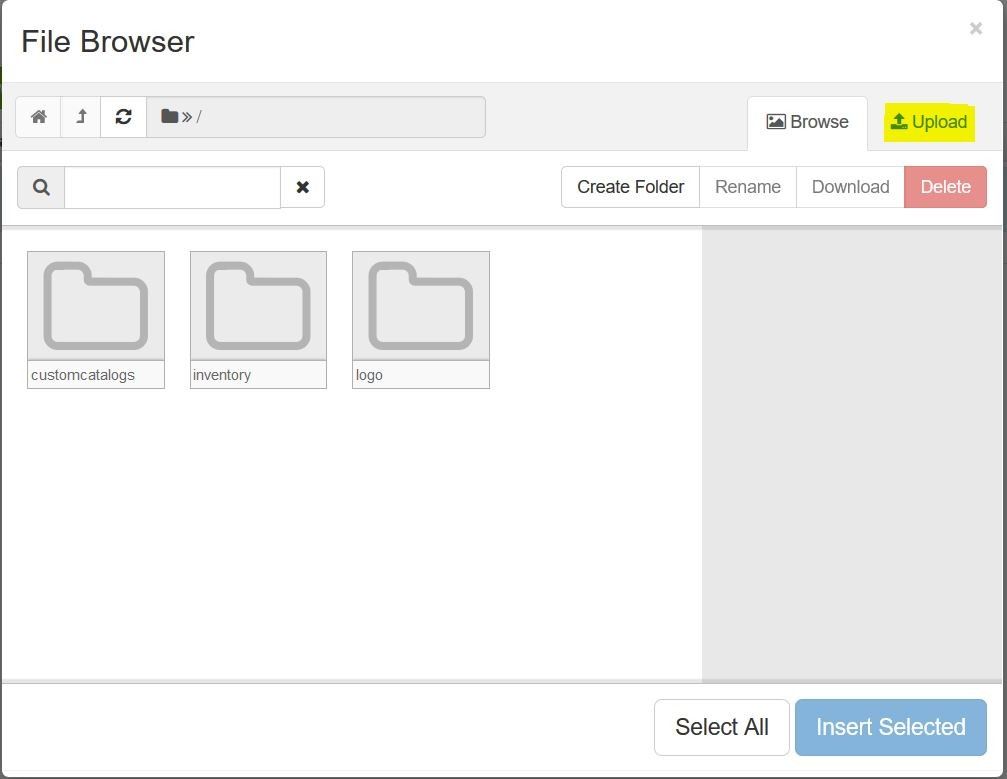
12. Once the File Browser appears click Upload in the upper right corner.
13. To the far left click Select Files beneath the File Browser title.
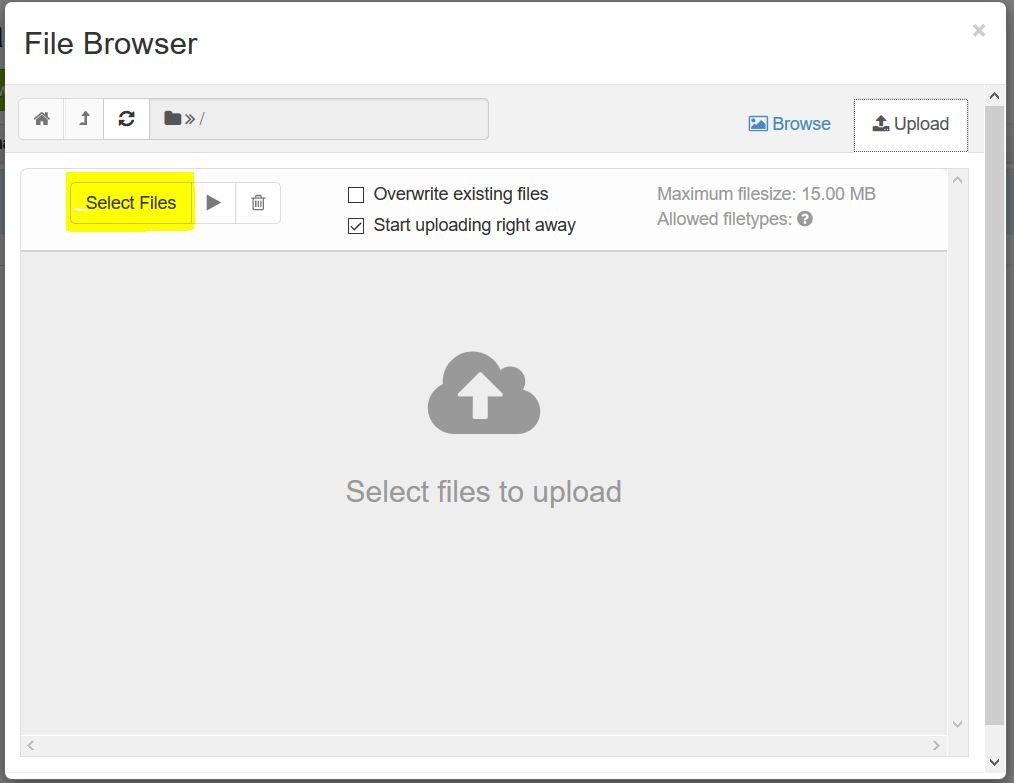
14. Select the first image you wish to upload so that is highlighted in blue. Hold down the Ctrl key and click the rest of the images you wish to upload in one large group. Click Open. If this product model is available in multiple sizes and colors make sure to include an example of each product variant available.

15. Once a full green status bar and 100% is seen to the right of each pictures file name click back to the browse tab.

16. Your newly uploaded pictures will be selectable on the Browse tab. Once all desired pictures have been selected click Insert selected in the lower right corner.

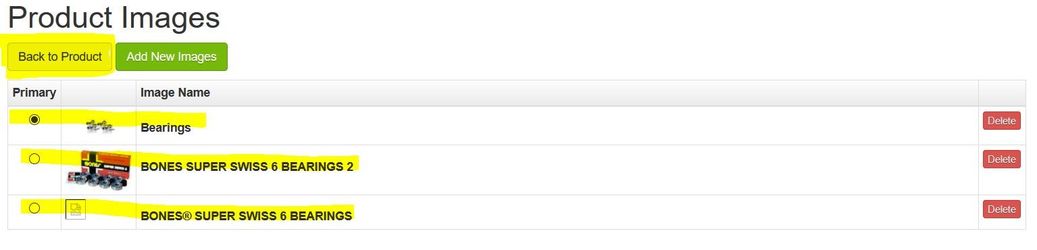
17. You will see the product images have been added. Click Back to Product in upper right corner.
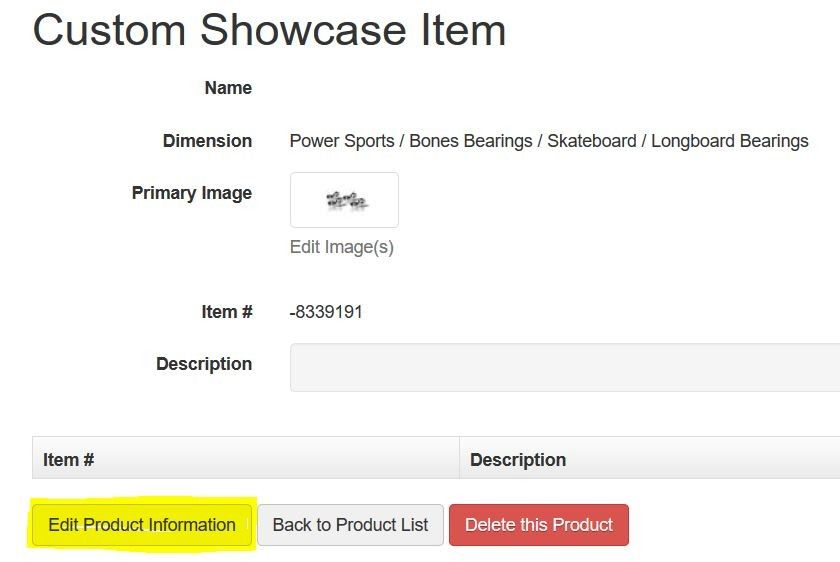
18. On the Custom Showcase Item page click Edit Product Information in the lower left corner.
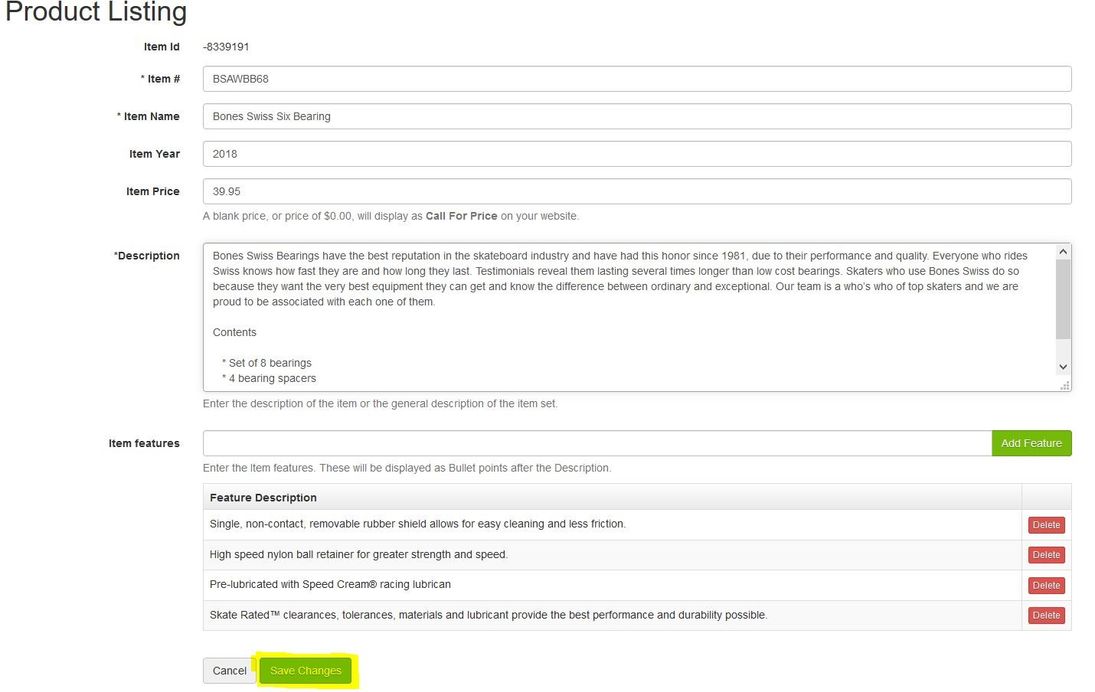
19. Fill in the following text fields, * Item #, * Item Name, Item Year, Item Price, * Description. Item Features (Clicking Add Feature after each separate feature). Click Save Changes in lower left hand corner. 
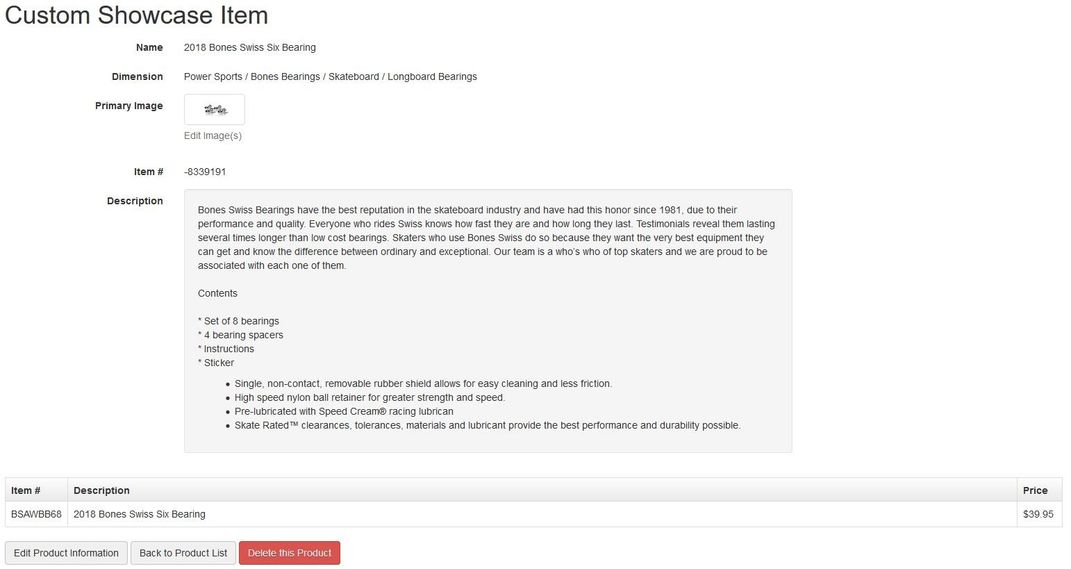
20. Your Product listing page should look something the the one below when finished. Click Save Changes in lower left corner.
21. Your new Custom Showcase item listing will look similar to what is below in the CMS editor.
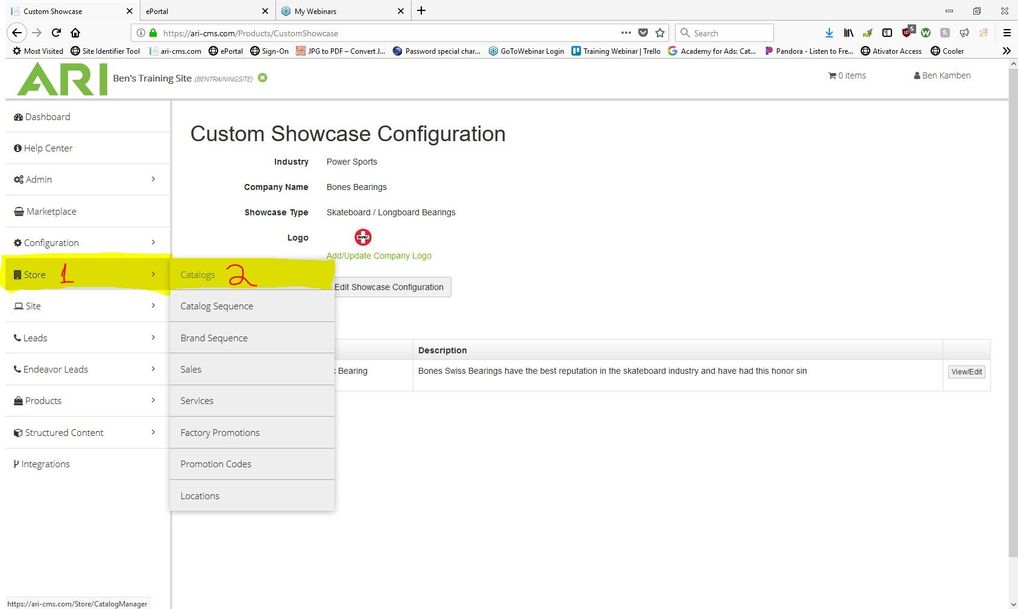
22. In the Main menu to the left click Store. Click Catalogs.
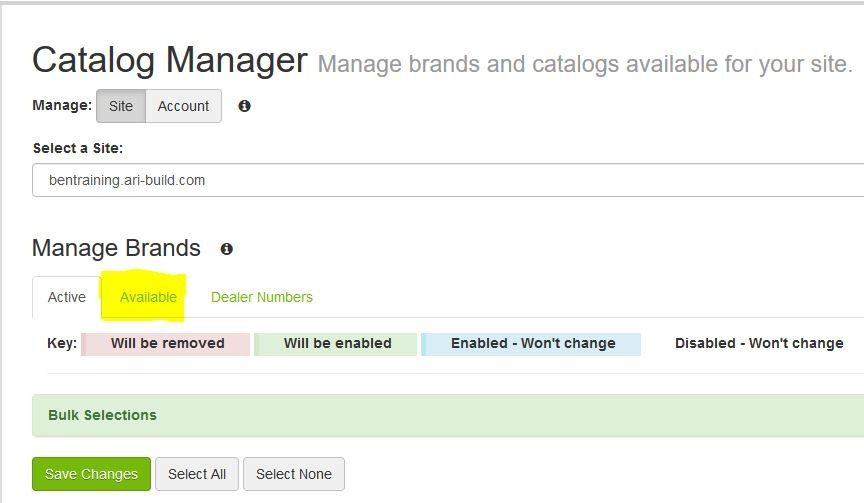
23. Under Manage Brands title click the Available tab.
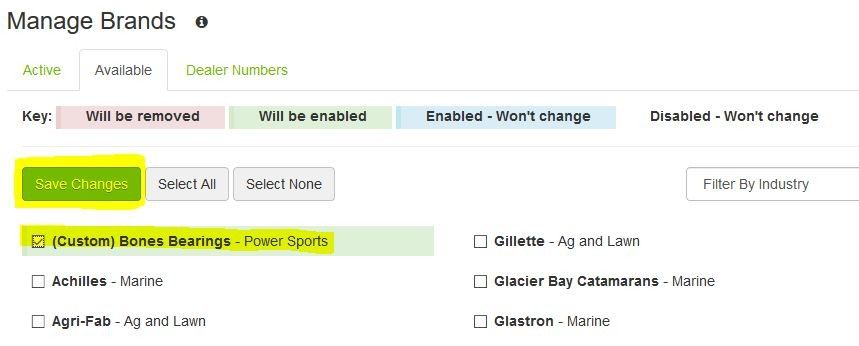
24. Check the check box to the left of (Custom) Bones Bearings - Power Sports. Click Save Changes.
25. Click Active Tab.
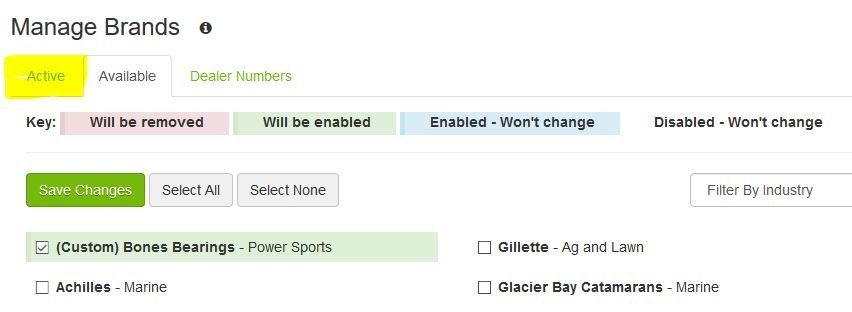
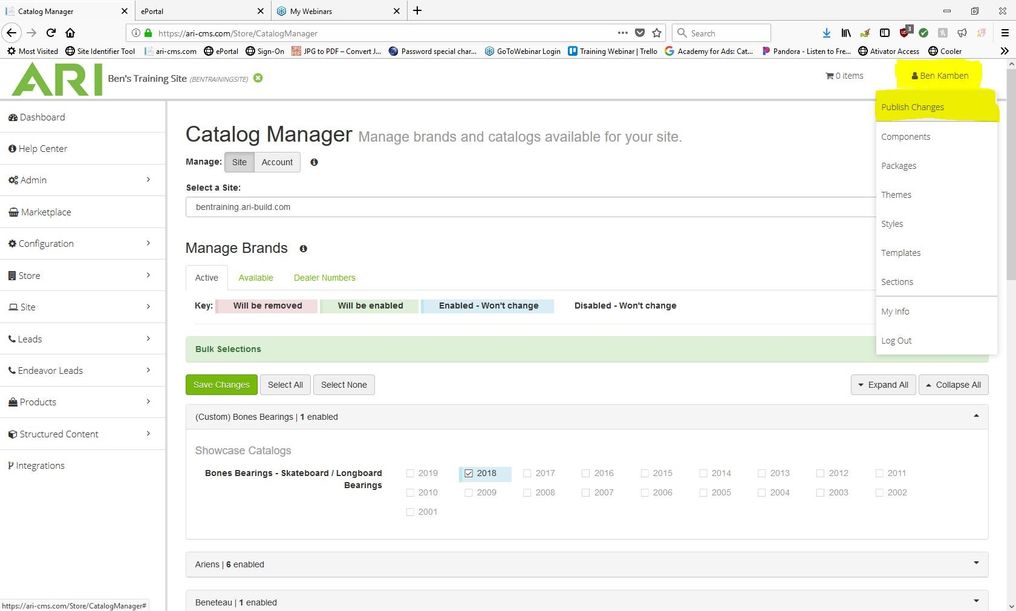
26. Click (Custom) Bones Bearings - Power Sports. Check the Check box to the left of 2018. Click Save Changes. Click on your name in upper right corner. Click Publish Changes.
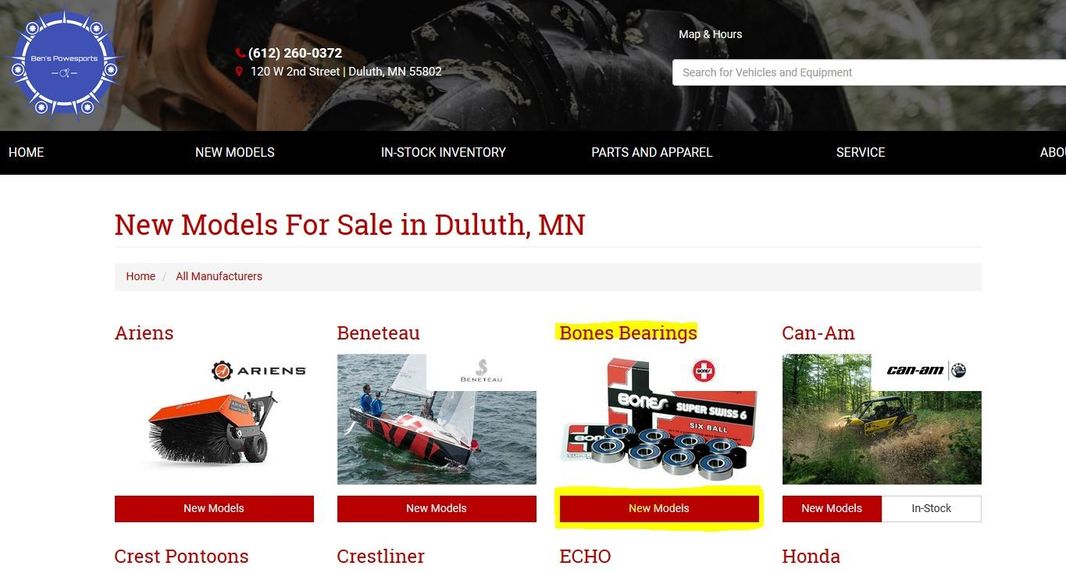
27. Click to the New Models page of your website. Click Bones Bearings.
28. The picture below is how the Product Details Page of your Custom Showcase product will look to your customer.
