...
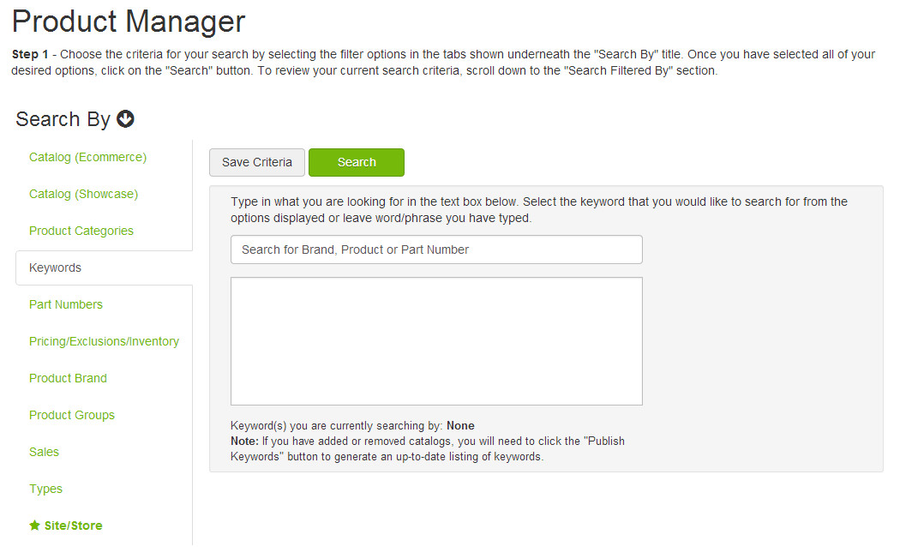
- Go to Products > Product Manager
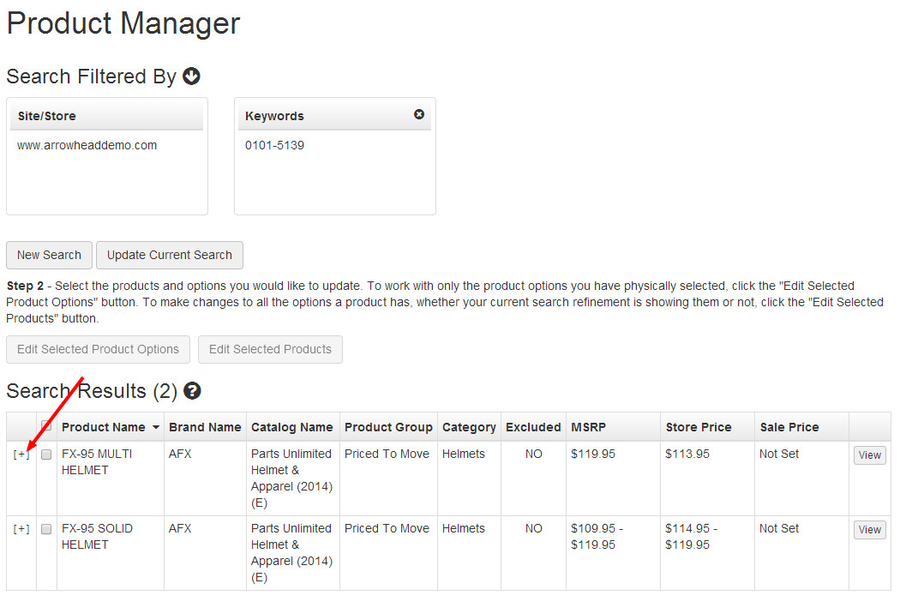
You will need to conduct a search for the products that you wish to modify. The default search tool is a keyword/part number search bar, or you could use the Search By buttons on the left side of the screen to find products using other methods.

- Search results will display in a table that includes several columns.

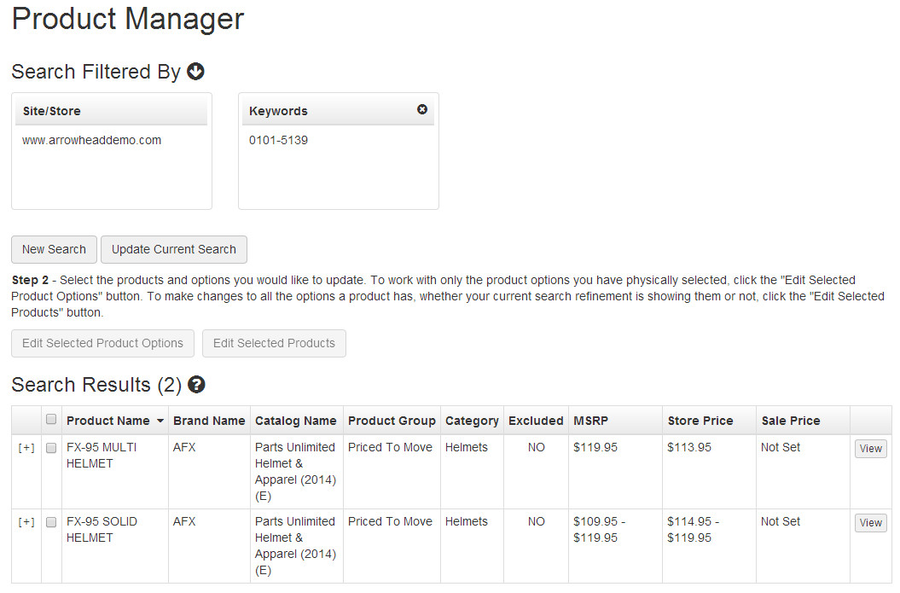
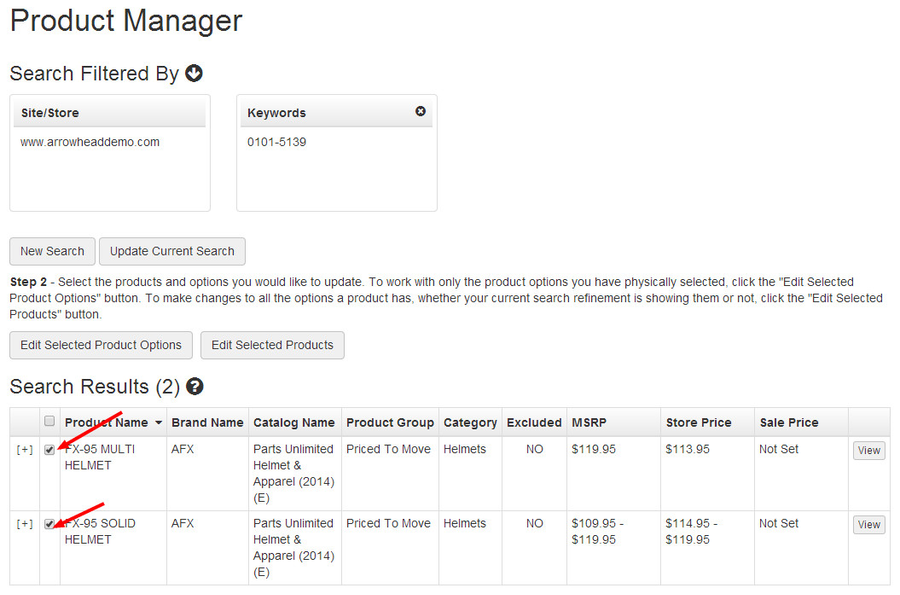
- Select the products that you would like to put on sale using the check boxes in each row. Remember, changes you make to products will affect all variants included in the product.

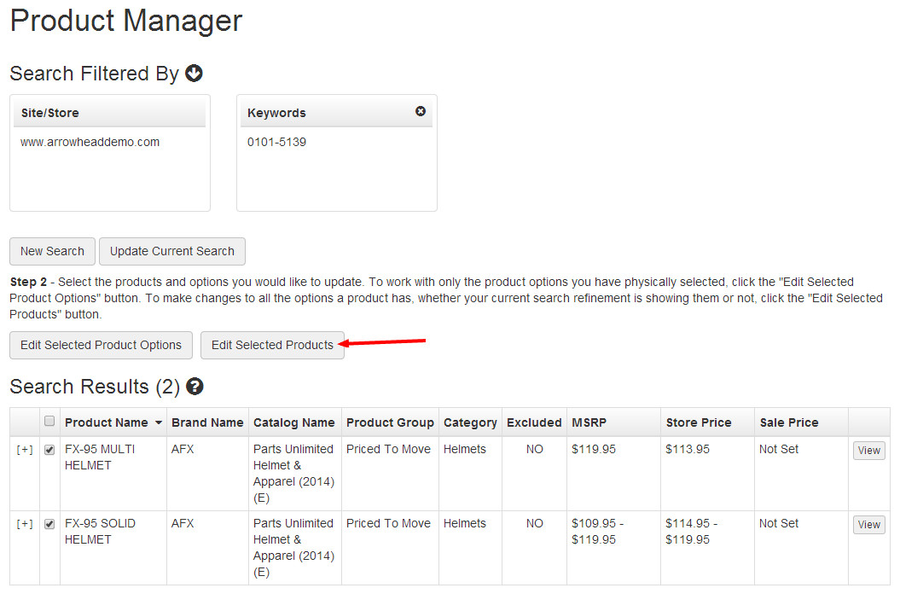
- Click the Edit Selected Products button.

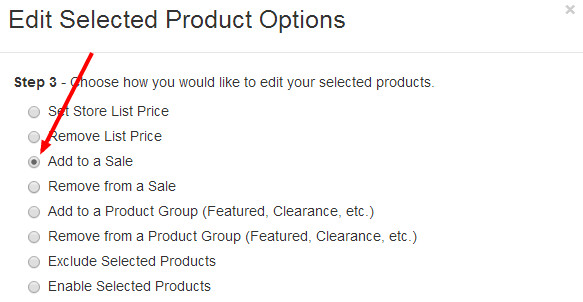
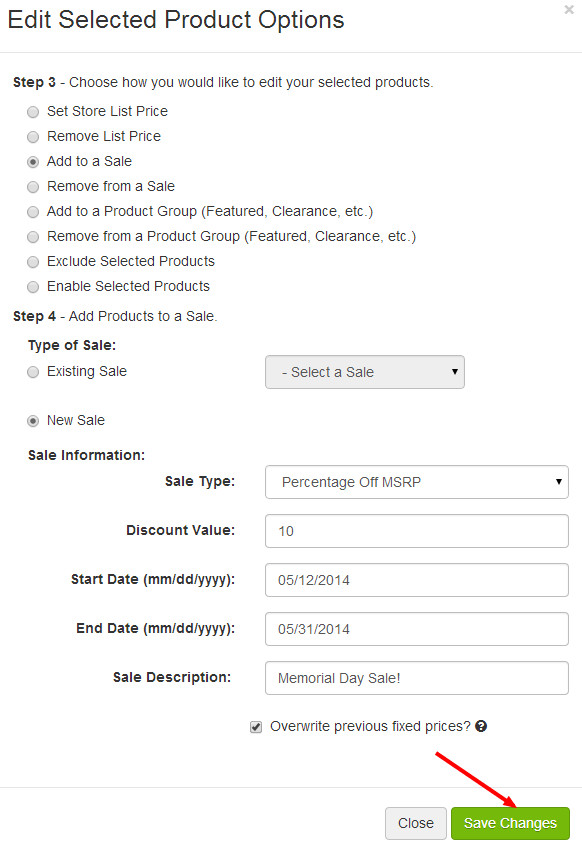
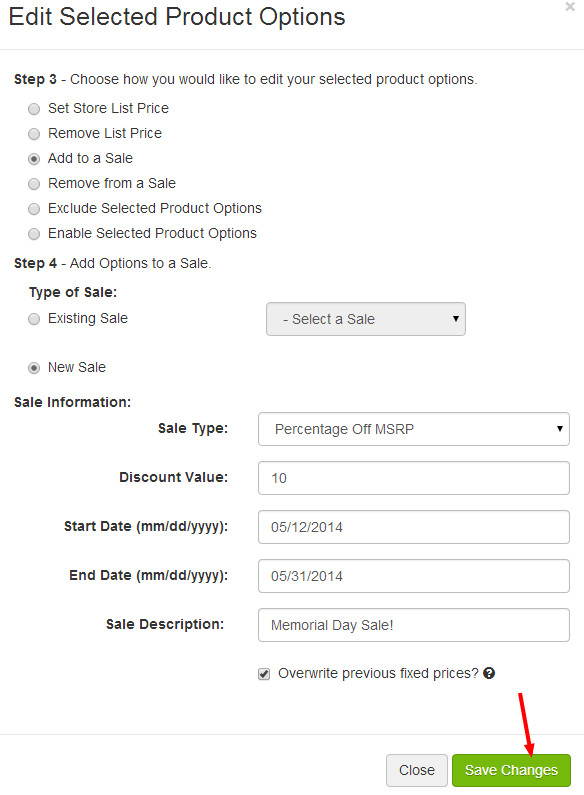
- In the Edit Selected Product Options dialog, select the Add to a Sale radio button.
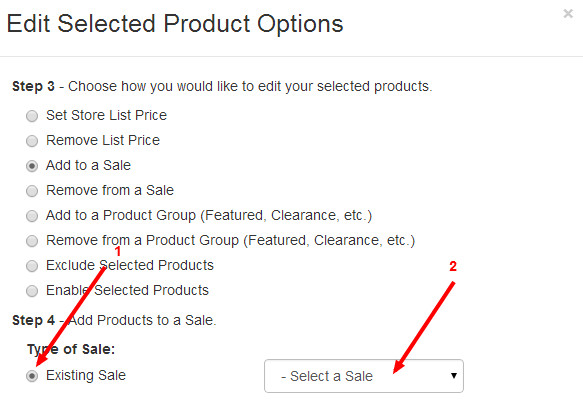
- If the sale you wish to add the product(s) to already exist, select the Existing Sale radio button and choose an existing sale from the dropdown menu. If using this method, skip to Step 9.
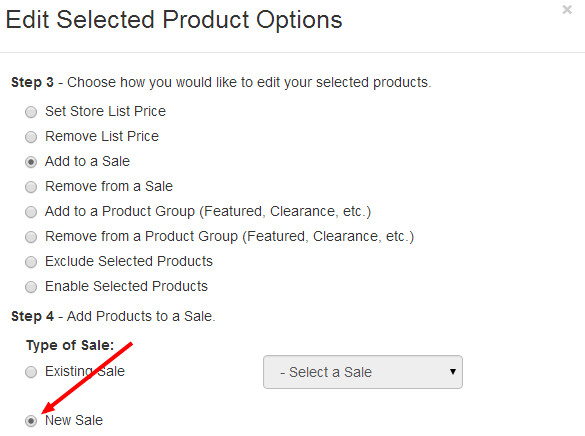
- If you are creating a new sale, select the New Sale radio button.
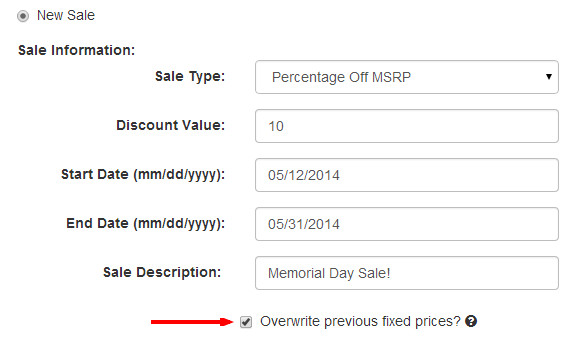
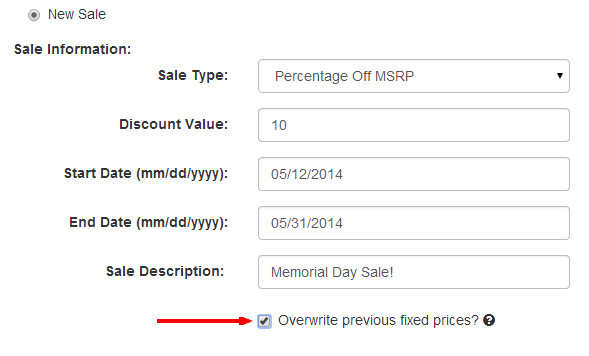
- Use the fields to set a Sale Type, Discount Value, Start/End dates, and a brief description. The description will display on the product page on your website, so avoid any internal language and think about using exciting sale descriptions. The description will also be useful for you to assign other products to this sale using the Existing Sale option, or for modifying the sale later.
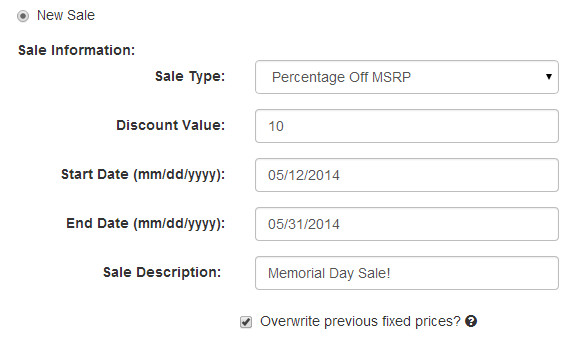
- Check the appropriate boxes to overwrite any pricing you've previously set or pricing that has been imported from your DMS.
- Click Save Changes.
- When you are finished adding products to sales, click Publish Changes and Publish Keywords from the Website dropdown in the upper-right corner of the Command Center.
...
- Go to Products > Product Manager
You will need to conduct a search for the products that you wish to modify. The default search tool is a keyword/part number search bar, or you could use the Search By buttons on the left side of the screen to find products using other methods.
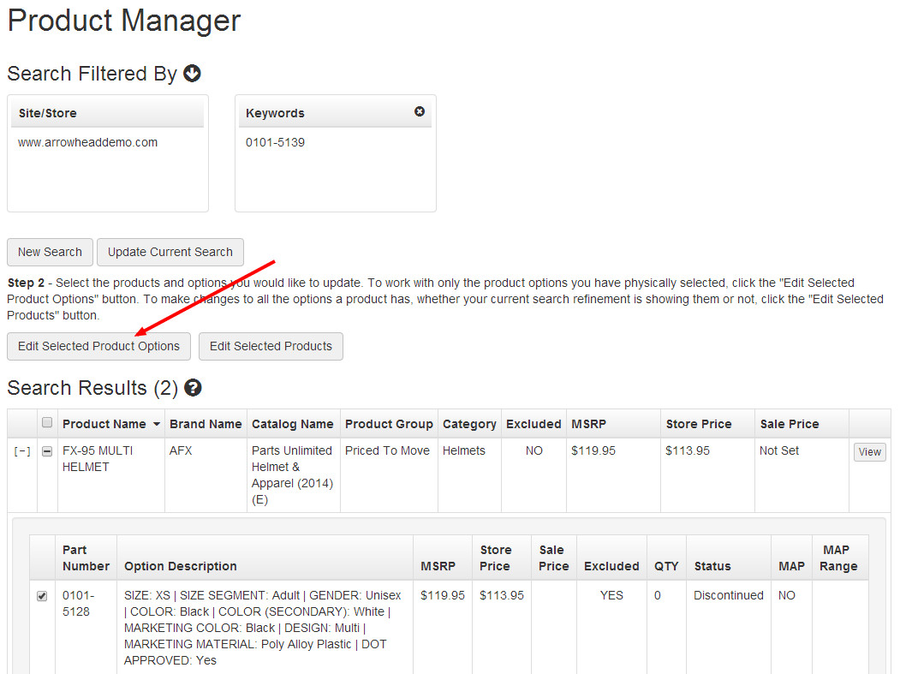
- Search results will display in a table that includes several columns.
- Expand the product result that contains the variants you wish to put on sale using the [ + ] displayed in the leftmost column.

- Select the check boxes next to the variants you wish to put on sale.

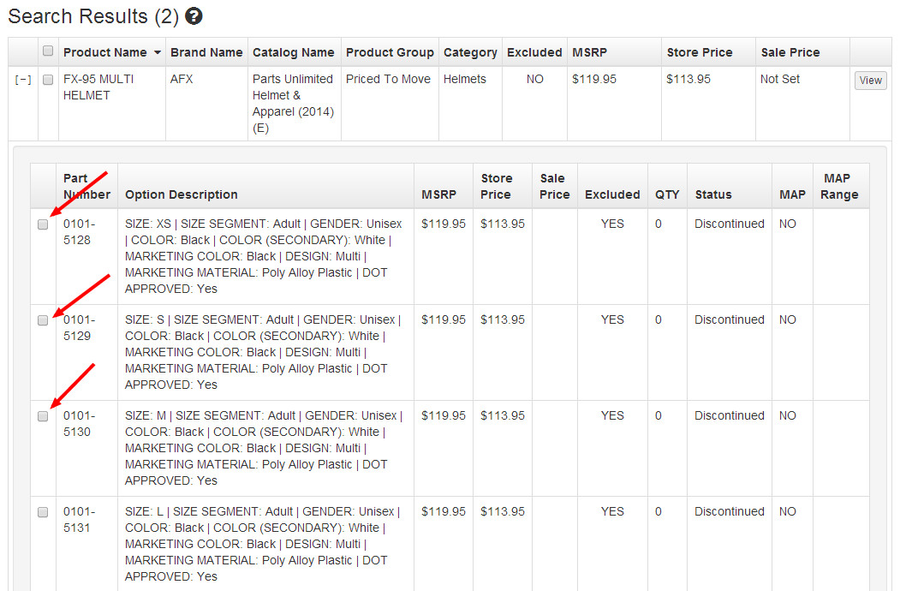
- Click the Edit Selected Product Options button.

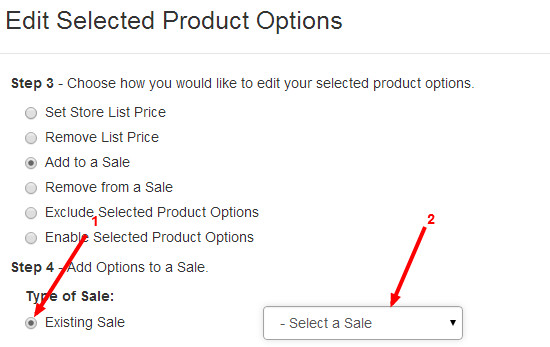
- In the Edit Selected Product Options dialog, select the Add to a Sale radio button.

- If the sale you wish to add the product variant(s) to already exist, select the Existing Sale radio button and choose an existing sale from the dropdown menu. If using this method, skip to Step 10 below.
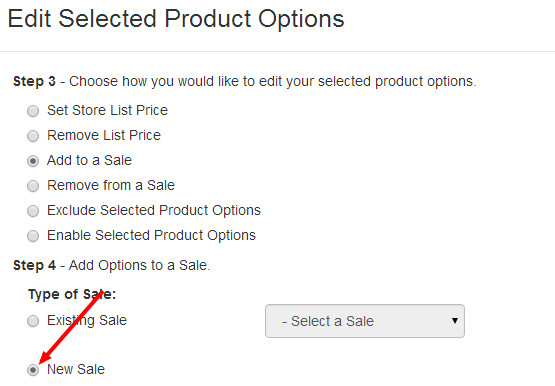
- If you are creating a new sale, select the New Sale radio button.
- Use the fields to set a Sale Type, Discount Value, Start/End dates, and a brief description. The description will display on the product page on your website, so avoid any internal language and think about using exciting sale descriptions. The description will also be useful for you to assign other products to this sale using the Existing Sale option, or for modifying the sale later.
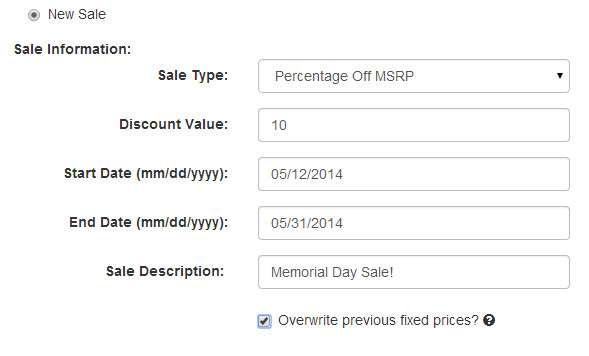
- Check the appropriate boxes to overwrite any pricing you've previously set or pricing that has been imported from your DMS.
- Click Save Changes.
- When you are finished adding variants to sales, click Publish Changes.
...